Saturday, January 14, 2012

The Daring Cooks Make Tamales!


My favourite memory of my first trip to Mexico was learning to cook many special dishes. I stayed for a month, with a former student in Queretaro. In the evenings, I helped her to plan her lessons in English, as she was also a teacher, but I had the days to myself. I did a lot of wandering around on my own and her mother and sister took me to different markets and restaurants, gathering ingredients and being invited into the kitchen. It was hilarious, because neither of them spoke any English and I didn't know much Spanish. We were all comfortable in the kitchen, though. I really must do a post on some of those dishes, but right now we need to talk tamales!

This was just about the best cooking challenge I could imagine. I had been wanting to make tamales for a long time, and in fact had had a bag of masa for tamales in my freezer for ages for just that purpose. I almost chose them for my own Daring Cooks' challenge but went Indian instead. The only thing holding me back was ... sheer laziness. I had heard that they were a lot of work and as you can see by my sparse posting here I just wasn't in a blogging mood. Maranda's challenge was just the kick in the pants I needed. I made two varieties: the ones above are pork cooked in guajillo chile salsa and wrapped in banana leaves. Below are chicken in a green chile and tomatillo salsa and wrapped in corn husks.
I much preferred the chicken ones. The corn husks were easier to work with than the banana leaves and the filling was far tastier. I think I got a dud batch of guajillo chiles, because the filling was bland. I ended up spicing up the remaining sauce with a couple of chipotles in adobo and that did the trick--wish I had thought of that when filling them. So, were they a ton of work? I don't think so. I spaced out the making of the filling and preparing the wrappers, then was able to wrap and tie about 25 corn and 18 banana tamales in the time it took to watch 1 episode of Mad Men. That Don Draper sure does make time fly. Then I steamed them and gave some away and froze the rest.
That cup in the back is one I got in Queretaro just before I left. It is my Mexican hot chocolate cup (I have many dishes that are only used for one specific food). I tried my hand at atole to accompany the tamales, as it is traditional. Atole is like hot chocolate thickened with corn masa. It's as thick as heavy cream, but made with a mixture of water, milk, masa and Mexican chocolate. I never liked it before, as it has a distinct corny flavour, but I added a dash of almond extract and ended up drinking 2 cups instead of eating the plate you see above. It was astonishingly good. Here's the recipe:

Chocolate Atole
Adapted from Rick Bayless

⅔ cup masa harina mixed with ½ cup warm water
8 ounces chopped Mexican chocolate (Abuelita or Ibarra)
3 cups water
3½ cups milk
1 teaspoon almond extract, optional
  1. Combine masa, chocolate and 3 cups water in a blender, blend until smooth. Place in a saucepan with the milk and cook, stirring constantly, over medium heat until it comes to a simmer. Thin with milk or water if it's too thick. Add almond extract (cinnamon would be good here, or rum).
  2. Strain into cups, or for frothy atole, strain into the rinsed blender and blend before pouring into mugs. 
Thanks so much to Maranda of Jolts & Jollies for such a fun challenge! You can see all the beautiful results on the Daring Kitchen homepage. Click here for the full challenge pdf with recipes, links and photos. 
Blog-checking lines: Maranda of Jolts & Jollies was our January 2012 Daring Cooks hostess with the mostess! Maranda challenged us to make traditional Mexican Tamales as our first challenge of the year!



Thursday, December 22, 2011

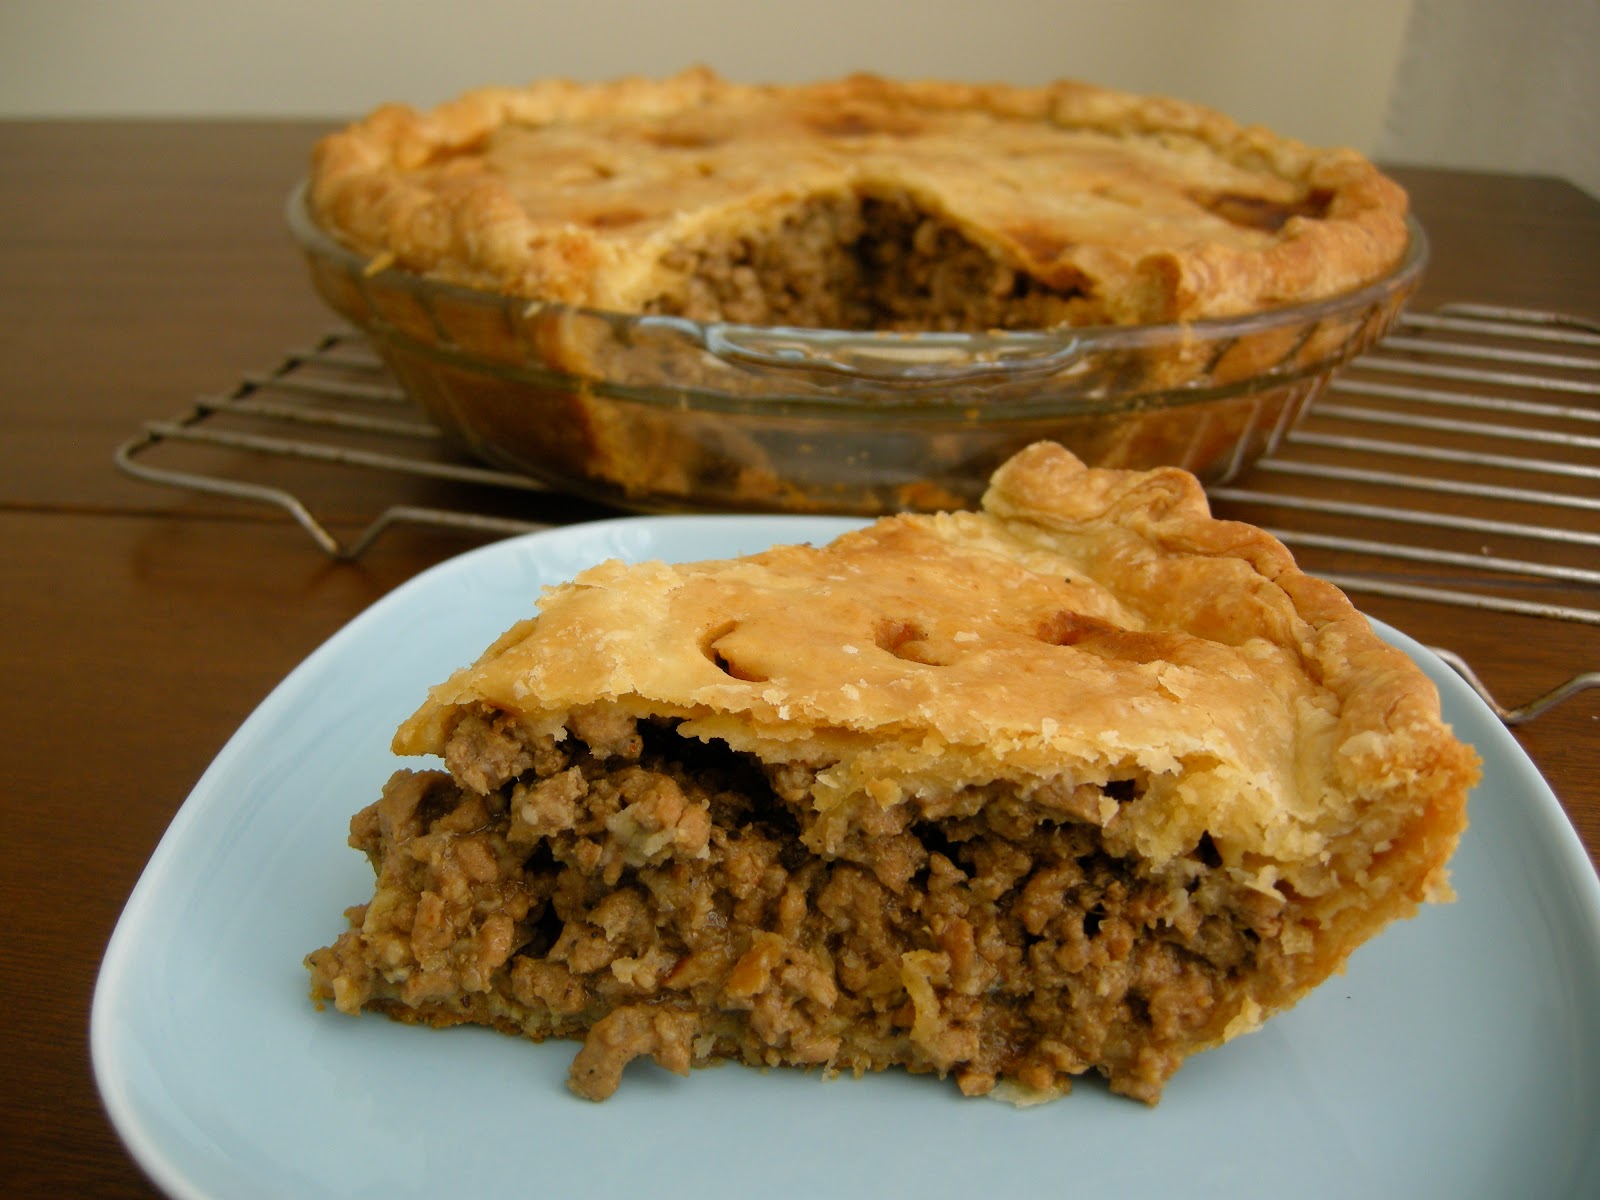
Tourtière, French-Canadian Meat Pie


Every year I bake huge amounts for the holidays, but I never make the same things. I may repeat a cookie or two, but I like to change it up. Even the decorated sugar cookies I make come from a different recipe every time (this year's recipe was a keeper, though I doubt I'll be able to find it again next year). You may be wondering just where the cookie posts have been. I've made at least 6 kinds of cookies but not managed to get photos. Most of them were boxed up and gifted as soon as they cooled. You've probably had enough cookies by now anyway, right?

So, how about something a little lighter? Well, not exactly light, but to me it's not Christmas without it. Tourtière is a French-Canadian meat pie that is always served at Christmastime, usually Christmas Eve. There are many variations, using different types of meat, including wild game but I always make mine with pork. The pie is rich but not fatty, spiced and incredibly savoury. Tourtière is best served with something acidic like a chutney or homemade ketchup or beet relish in my case. Actually I don't like anything at all on it, just some of my homemade coleslaw on the side. I'll be sharing this pie with my family on Christmas Eve, and may even make another one for Christmas Day. It's so much better than turkey, trust me.

Tourtière
Source: Lucy Waverman, The Globe and Mail
Makes 1 double-crust pie

Crust for a double-crust pie: lard is traditional, but I used this butter one

2 tablespoons oil
3 cups chopped onions
1 kilogram/2 pounds ground pork
3 cloves garlic, finely minced
½ teaspoon ground allspice (I used 2 allspice berries, ground)
¼ teaspoon ground cloves (I used 2 whole cloves, ground)
generous ¼ teaspoon cayenne
½ teaspoon freshly ground nutmeg
2 teaspoons dried savoury
1 teaspoon dried thyme
1 bay leaf
salt and pepper
1 cup beef or chicken broth
2-3 tablespoons oatmeal
  1. Saute onions over medium heat until softened and brown. Increase heat and add pork, breaking it up and sauteing until no longer pink. Add garlic and all spices and saute for another few minutes, stirring and continuing to break up the pork. Drain fat if necessary. Add broth and oatmeal and simmer, covered for 45 minutes, until thick. Taste and add additional salt and pepper if needed. Cool.
  2. Preheat oven to 450℉. Roll out half of pastry and line a 9" deep pie plate. Fill with meat mixture and top with crust. Flute edges and make slits in pastry for steam to escape. Bake 10 minutes, then reduce heat to 375℉ and bake for another 35-45 minutes, until golden brown. Let cool slightly before cutting and serving. Serve warm or cold.


Friday, December 16, 2011

The Daring Cooks Make Char Siu Bao!

Do you know that saying 'A day late and a dollar short'? I think that's my motto. I seem incapable of getting anything done on time. Completely done is more accurate. This challenge was made and it was only the photo (and the dreaded write-up) that were missing (for the third challenge in a row). So, what do you get? A short post and a photo of a 4-day-old steamed bun. Merry Christmas!
I love barbequed pork and steamed buns, but I had few of the ingredients to make these. So, I went over to a friend's place. She has a cupboard full of Chinese cooking ingredients and has taken cooking classes in Beijing. In fact, she had made this exact dish there. Unable to follow a recipe to the letter, I combined a few different recipes to make the marinade for the pork. The most interesting ingredient was fermented tofu marinated in rice vinegar and ground red rice. We didn't need any food colouring with this, and you can see that the pork was quite pink. I assure you that it was cooked. I also used pork shoulder, as tenderloin can be dry, being the boneless skinless chicken breast of the pig world. The picture above is of the very end piece, which was fattier than the rest. The meat had a great texture and flavour. For the buns, we boiled the marinade as a sauce, adding a bit more of this and that to make it delicious. 
This was a fun and tasty challenge, and it really wasn't that much work, so I urge you to try it. Thanks Sara of Belly Rumbles! Check out what the rest of the Daring Cooks made in the slideshow. Find the full challenge and recipe pdf here.

Our Daring Cooks’ December 2011 hostess is Sara from Belly Rumbles! Sara chose awesome Char Sui Bao as our challenge, where we made the buns, Char Sui, and filling from scratch – delicious!


Wednesday, December 7, 2011

Nutty as...


How would you finish that title? Fruitcake, right? I couldn't bring myself to put fruitcake in the title, because I am a lifelong and vocal fruitcake basher. I can't stand the stuff, but not so much because it's like a brick, but because it has raisins in it. Raisins, and nasty artificially dyed 'fruit'. Since when are cherries bright green? Blech. Nuts and booze and nice dried fruit are just fine with me, however. So, when I saw this cake I thought I'd give it a try. I wasn't sure, though, so it took a few years for it to make the move from bookmarked to baked. And another month and a bit to make the move from baked to blogged (and eaten), but at least I was bathing it in Amaretto for that month. The results were surprisingly good. I cut into one to share some with a friend and found myself unable to stop taking another thin slice, and another and then maybe just one more. Make it now and it'll be fab over the holidays.

Oh, I forgot the almost-best part: it's called Dowager Duchess Fruitcake! I think I saved it for the name alone. It's full of candied orange peel and almonds, but there is cake too, reminiscent of pound cake. The original recipe called for sherry, which sounded too dowager-y and dowdy to me. I used rum, then doused it with Amaretto, about ⅓ cup for each cake over a month, making it potent and tasty too. I won't get up on a fruitcakey soapbox and try to convince you that this is the fruitcake that will erase all your bad fruitcake memories like so many well-meaning folks have done to me, but I will say that I like it very much indeed.
What I used for a half recipe

Dowager Duchess Fruitcake
Slightly adapted from Martha Stewart
Makes 2-9" loaves, apparently, but it wouldn't fit in my loaf pan. I made 2-6" cakes instead from a half recipe


1 pound/454 grams unsalted butter, at room temperature
2 pounds 4 ounces/1 kilogram candied orange peel, cut in 1 cm pieces (I made my own, but you can buy it too)
15 ounces/425 grams whole blanched almonds
2½ cups sugar
5 large eggs
3 tablespoons Amaretto or rum, plus extra for soaking
4 cups all-purpose flour

  1. Preheat oven to 300℉/150℃. Line cake pans with buttered parchment paper. Combine orange peel and almonds in a large bowl and set aside.
  2. In a large mixing bowl, cream butter and sugar until light and fluffy, about 3 minutes. Add eggs, one at a time, scraping bowl after each addition. Add Amaretto/rum. 
  3. Reduce mixer speed to low and add flour a cup at a time, beating only until combined. Fold in orange peel/almond mixture.
  4. Divide batter amongst pans. You can fill to the top as it doesn't rise. Bake until golden and a tester comes out clean, about 1 to 1¼ hours. Remove from oven and douse each cake with 2-3 tablespoons Amaretto, depending on size of cakes. Let cool completely on rack.
  5. Remove cakes from pans and discard parchment. Wrap in cheesecloth and store in a tin in a cool, dark place for 1 month, dousing them with Amaretto (1-2 tablespoons) once a week. I alternated soaking the top and bottom and turned the cakes every week.
  6. Slice thinly to serve.


Sunday, November 27, 2011

Coconut Grapefruit Sans Rival


Do you sometimes have trouble paying attention when you are baking? I have trouble paying attention at the best of times, but making this dessert was more difficult than it needed to be because I was in space cadet mode. I blame it on all the kindergarten I taught this week--many little kids and their snowsuits and winter accessories turn my brain to mush. I only decided to make this dessert at the last minute, as I was worried it would be too rich and too sweet (it is basically buttered meringue, after all). To balance the sweetness a bit, I made a grapefruit curd to add to the buttercream. I reduced the grapefruit juice by half, which meant that the curd was a bit too bitter on its own, but it was perfect in the buttercream: difficult to identify, but encouraging another taste to figure out the mystery ingredient. Too bad I only had pink grapefruits--red ones would have made for a prettier frosting.

I made a small version of this, using 5 eggs in total: 2 for the curd, 3 whites for the dacquoise and 3 yolks for the buttercream. The original recipe calls for 10 egg whites and 5 yolks for 12 servings, but I got 8 servings from my mini version (13x13x6.5cm). Instead of baking it in pans, I traced a paper CD envelope onto the foil using a chopstick. I wanted to pipe the meringue mixture, but I got two, yes two, yolks in the meringue so it wasn't the most durable stuff. I started out well, separating the first egg neatly. Then, who knows what happened, but I cracked the next egg with such force and flung it in the bowl before noticing that I had mixed yolks and whites, and the yolk was broken. Oops. I scooped it out and did the very same thing with the next egg. This yolk was really broken up and I was unable to remove it all from the whites. I considered pitching the whole thing but I was out of eggs. So, with a few choice words, I started beating the whites anyway. It worked rather well, and I got fairly stiff peaks. So, I folded in a pile of unsweetened coconut and that's when I got a bit worried. Rather than manhandle (Maryhandle?) it any more by putting it in a piping bag, I quickly spread it with a palette knife, got it in the oven and hoped for the best. It was fine, so don't panic about a tiny bit of yolk in your egg whites!
I halved this piece to make 2 servings
The French buttercream was easy to make, and not as fussy as the meringue one I usually choose. I always find that moment when you are beating the butter in and it finally comes together a bit off-putting. It's when the bowl of beaten yolks (or whites) begins to look exactly like a bowl of beaten butter. That's when I start to calculate just how much butter will be in every piece and how many pieces I am likely to eat. 2 tablespoons, in case you were wondering, and totally worth a brisk walk or ten. I'll always choose real buttercream over that nasty, gritty powdered sugar stuff.

Putting it together was easy enough, except that the kitchen was quite warm by this time and frosting each layer pushed the ones below off kilter. I eventually got it somewhat straight, so I just left it alone, intending to fix it up the next day. That didn't happen. Instead, I added a few flakes of fresh coconut and dug in. I don't think my Sans Rival is going to rival any of the beauties you'll find on the Daring Kitchen, but it tasted great! Thanks to Catherine for a fun challenge. Now, what to do with the extra buttercream and grapefruit curd???

Full challenge PDF with photos and recipes.

Blog-checking lines: Catherine of Munchie Musings was our November Daring Bakers’ host and she challenged us to make a traditional Filipino dessert – the delicious Sans Rival cake! And for those of us who wanted to try an additional Filipino dessert, Catherine also gave us a bonus recipe for Bibingka which comes from her friend Jun of Jun-blog.