Thursday, December 22, 2011

Tourtière, French-Canadian Meat Pie


Every year I bake huge amounts for the holidays, but I never make the same things. I may repeat a cookie or two, but I like to change it up. Even the decorated sugar cookies I make come from a different recipe every time (this year's recipe was a keeper, though I doubt I'll be able to find it again next year). You may be wondering just where the cookie posts have been. I've made at least 6 kinds of cookies but not managed to get photos. Most of them were boxed up and gifted as soon as they cooled. You've probably had enough cookies by now anyway, right?

So, how about something a little lighter? Well, not exactly light, but to me it's not Christmas without it. Tourtière is a French-Canadian meat pie that is always served at Christmastime, usually Christmas Eve. There are many variations, using different types of meat, including wild game but I always make mine with pork. The pie is rich but not fatty, spiced and incredibly savoury. Tourtière is best served with something acidic like a chutney or homemade ketchup or beet relish in my case. Actually I don't like anything at all on it, just some of my homemade coleslaw on the side. I'll be sharing this pie with my family on Christmas Eve, and may even make another one for Christmas Day. It's so much better than turkey, trust me.

Tourtière
Source: Lucy Waverman, The Globe and Mail
Makes 1 double-crust pie

Crust for a double-crust pie: lard is traditional, but I used this butter one

2 tablespoons oil
3 cups chopped onions
1 kilogram/2 pounds ground pork
3 cloves garlic, finely minced
½ teaspoon ground allspice (I used 2 allspice berries, ground)
¼ teaspoon ground cloves (I used 2 whole cloves, ground)
generous ¼ teaspoon cayenne
½ teaspoon freshly ground nutmeg
2 teaspoons dried savoury
1 teaspoon dried thyme
1 bay leaf
salt and pepper
1 cup beef or chicken broth
2-3 tablespoons oatmeal
  1. Saute onions over medium heat until softened and brown. Increase heat and add pork, breaking it up and sauteing until no longer pink. Add garlic and all spices and saute for another few minutes, stirring and continuing to break up the pork. Drain fat if necessary. Add broth and oatmeal and simmer, covered for 45 minutes, until thick. Taste and add additional salt and pepper if needed. Cool.
  2. Preheat oven to 450℉. Roll out half of pastry and line a 9" deep pie plate. Fill with meat mixture and top with crust. Flute edges and make slits in pastry for steam to escape. Bake 10 minutes, then reduce heat to 375℉ and bake for another 35-45 minutes, until golden brown. Let cool slightly before cutting and serving. Serve warm or cold.


Friday, December 16, 2011

The Daring Cooks Make Char Siu Bao!

Do you know that saying 'A day late and a dollar short'? I think that's my motto. I seem incapable of getting anything done on time. Completely done is more accurate. This challenge was made and it was only the photo (and the dreaded write-up) that were missing (for the third challenge in a row). So, what do you get? A short post and a photo of a 4-day-old steamed bun. Merry Christmas!
I love barbequed pork and steamed buns, but I had few of the ingredients to make these. So, I went over to a friend's place. She has a cupboard full of Chinese cooking ingredients and has taken cooking classes in Beijing. In fact, she had made this exact dish there. Unable to follow a recipe to the letter, I combined a few different recipes to make the marinade for the pork. The most interesting ingredient was fermented tofu marinated in rice vinegar and ground red rice. We didn't need any food colouring with this, and you can see that the pork was quite pink. I assure you that it was cooked. I also used pork shoulder, as tenderloin can be dry, being the boneless skinless chicken breast of the pig world. The picture above is of the very end piece, which was fattier than the rest. The meat had a great texture and flavour. For the buns, we boiled the marinade as a sauce, adding a bit more of this and that to make it delicious. 
This was a fun and tasty challenge, and it really wasn't that much work, so I urge you to try it. Thanks Sara of Belly Rumbles! Check out what the rest of the Daring Cooks made in the slideshow. Find the full challenge and recipe pdf here.

Our Daring Cooks’ December 2011 hostess is Sara from Belly Rumbles! Sara chose awesome Char Sui Bao as our challenge, where we made the buns, Char Sui, and filling from scratch – delicious!


Wednesday, December 7, 2011

Nutty as...


How would you finish that title? Fruitcake, right? I couldn't bring myself to put fruitcake in the title, because I am a lifelong and vocal fruitcake basher. I can't stand the stuff, but not so much because it's like a brick, but because it has raisins in it. Raisins, and nasty artificially dyed 'fruit'. Since when are cherries bright green? Blech. Nuts and booze and nice dried fruit are just fine with me, however. So, when I saw this cake I thought I'd give it a try. I wasn't sure, though, so it took a few years for it to make the move from bookmarked to baked. And another month and a bit to make the move from baked to blogged (and eaten), but at least I was bathing it in Amaretto for that month. The results were surprisingly good. I cut into one to share some with a friend and found myself unable to stop taking another thin slice, and another and then maybe just one more. Make it now and it'll be fab over the holidays.

Oh, I forgot the almost-best part: it's called Dowager Duchess Fruitcake! I think I saved it for the name alone. It's full of candied orange peel and almonds, but there is cake too, reminiscent of pound cake. The original recipe called for sherry, which sounded too dowager-y and dowdy to me. I used rum, then doused it with Amaretto, about ⅓ cup for each cake over a month, making it potent and tasty too. I won't get up on a fruitcakey soapbox and try to convince you that this is the fruitcake that will erase all your bad fruitcake memories like so many well-meaning folks have done to me, but I will say that I like it very much indeed.
What I used for a half recipe

Dowager Duchess Fruitcake
Slightly adapted from Martha Stewart
Makes 2-9" loaves, apparently, but it wouldn't fit in my loaf pan. I made 2-6" cakes instead from a half recipe


1 pound/454 grams unsalted butter, at room temperature
2 pounds 4 ounces/1 kilogram candied orange peel, cut in 1 cm pieces (I made my own, but you can buy it too)
15 ounces/425 grams whole blanched almonds
2½ cups sugar
5 large eggs
3 tablespoons Amaretto or rum, plus extra for soaking
4 cups all-purpose flour

  1. Preheat oven to 300℉/150℃. Line cake pans with buttered parchment paper. Combine orange peel and almonds in a large bowl and set aside.
  2. In a large mixing bowl, cream butter and sugar until light and fluffy, about 3 minutes. Add eggs, one at a time, scraping bowl after each addition. Add Amaretto/rum. 
  3. Reduce mixer speed to low and add flour a cup at a time, beating only until combined. Fold in orange peel/almond mixture.
  4. Divide batter amongst pans. You can fill to the top as it doesn't rise. Bake until golden and a tester comes out clean, about 1 to 1¼ hours. Remove from oven and douse each cake with 2-3 tablespoons Amaretto, depending on size of cakes. Let cool completely on rack.
  5. Remove cakes from pans and discard parchment. Wrap in cheesecloth and store in a tin in a cool, dark place for 1 month, dousing them with Amaretto (1-2 tablespoons) once a week. I alternated soaking the top and bottom and turned the cakes every week.
  6. Slice thinly to serve.


Sunday, November 27, 2011

Coconut Grapefruit Sans Rival


Do you sometimes have trouble paying attention when you are baking? I have trouble paying attention at the best of times, but making this dessert was more difficult than it needed to be because I was in space cadet mode. I blame it on all the kindergarten I taught this week--many little kids and their snowsuits and winter accessories turn my brain to mush. I only decided to make this dessert at the last minute, as I was worried it would be too rich and too sweet (it is basically buttered meringue, after all). To balance the sweetness a bit, I made a grapefruit curd to add to the buttercream. I reduced the grapefruit juice by half, which meant that the curd was a bit too bitter on its own, but it was perfect in the buttercream: difficult to identify, but encouraging another taste to figure out the mystery ingredient. Too bad I only had pink grapefruits--red ones would have made for a prettier frosting.

I made a small version of this, using 5 eggs in total: 2 for the curd, 3 whites for the dacquoise and 3 yolks for the buttercream. The original recipe calls for 10 egg whites and 5 yolks for 12 servings, but I got 8 servings from my mini version (13x13x6.5cm). Instead of baking it in pans, I traced a paper CD envelope onto the foil using a chopstick. I wanted to pipe the meringue mixture, but I got two, yes two, yolks in the meringue so it wasn't the most durable stuff. I started out well, separating the first egg neatly. Then, who knows what happened, but I cracked the next egg with such force and flung it in the bowl before noticing that I had mixed yolks and whites, and the yolk was broken. Oops. I scooped it out and did the very same thing with the next egg. This yolk was really broken up and I was unable to remove it all from the whites. I considered pitching the whole thing but I was out of eggs. So, with a few choice words, I started beating the whites anyway. It worked rather well, and I got fairly stiff peaks. So, I folded in a pile of unsweetened coconut and that's when I got a bit worried. Rather than manhandle (Maryhandle?) it any more by putting it in a piping bag, I quickly spread it with a palette knife, got it in the oven and hoped for the best. It was fine, so don't panic about a tiny bit of yolk in your egg whites!
I halved this piece to make 2 servings
The French buttercream was easy to make, and not as fussy as the meringue one I usually choose. I always find that moment when you are beating the butter in and it finally comes together a bit off-putting. It's when the bowl of beaten yolks (or whites) begins to look exactly like a bowl of beaten butter. That's when I start to calculate just how much butter will be in every piece and how many pieces I am likely to eat. 2 tablespoons, in case you were wondering, and totally worth a brisk walk or ten. I'll always choose real buttercream over that nasty, gritty powdered sugar stuff.

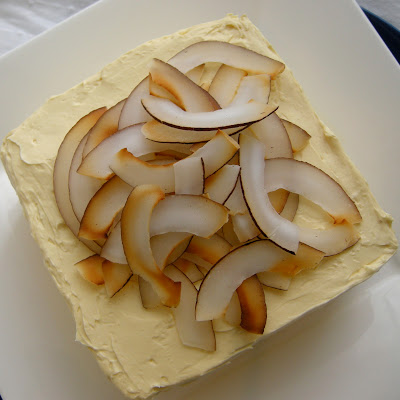
Putting it together was easy enough, except that the kitchen was quite warm by this time and frosting each layer pushed the ones below off kilter. I eventually got it somewhat straight, so I just left it alone, intending to fix it up the next day. That didn't happen. Instead, I added a few flakes of fresh coconut and dug in. I don't think my Sans Rival is going to rival any of the beauties you'll find on the Daring Kitchen, but it tasted great! Thanks to Catherine for a fun challenge. Now, what to do with the extra buttercream and grapefruit curd???

Full challenge PDF with photos and recipes.

Blog-checking lines: Catherine of Munchie Musings was our November Daring Bakers’ host and she challenged us to make a traditional Filipino dessert – the delicious Sans Rival cake! And for those of us who wanted to try an additional Filipino dessert, Catherine also gave us a bonus recipe for Bibingka which comes from her friend Jun of Jun-blog.

Friday, November 18, 2011

Oatmeal, Coconut and Macadamia Nut Cookies


Do you bake to create something new? To recreate a taste memory? To use up a surplus of ingredients? Or just because you need something sweet? I bake for all of those reasons, but this recipe is one in a series of cookies I've been making over the past few years trying to recreate a teenage indulgence. I was never a mall rat, but whenever I did go I would pick up a cookie at a famous cookie franchise. It was called Mrs. something or other... They were huge and chewy with a centre verging on raw. I loved them and could make one last all day. Like I said, they were huge. This chain sold lots of cookies but this one was my favourite for a number of reasons: it did not contain chocolate; it had coconut; and macadamia nuts. Oh and I did I mention the size? It does matter.
A few years ago I was at a mall and went to pick one up only to find they had been discontinued for years! Like I said, I'm not a big shopper. I was disappointed so I set out to make them myself. Over the years I've taken a few cracks at the recipe, but my results have always been too cakey or too crisp. Sometimes the cookie didn't spread at all, other times it spread all over the place. I even tried to adapt a few ANZAC biscuits recipes, as they are full of oats and coconut, but they weren't quite right either. My most recent attempt is the first I have been mostly happy with. It's almost thick enough and chewy--almost too chewy. I used golden syrup instead of white sugar along with old-fashioned rolled oats and shredded coconut, but will try quick oats and flaked coconut next time. And maybe change the ratio of flour to coconut/oats to give me exactly what I'm looking for. That said, these were delicious and if you're a cookie dough monster like me you'll love them raw or baked.

Oatmeal Coconut and Macadamia Nut Cookies
Adapted from Chewy, Gooey, Crispy, Crunchy by Alice Medrich
2 cups rolled oats
¼ cup water
5.625 ounces/1¼ cups all-purpose flour
½ teaspoon baking soda
pinch freshly grated nutmeg
8 ounces/1 cup unsalted butter
5.25 ounces/¾ cup packed light brown sugar
¼ cup golden syrup
1 teaspoon vanilla
½ teaspoon salt
1 large egg
1 cup roasted, salted macadamia nuts, coarsely chopped
1 cup sweetened coconut

  1. Place the oats in a bowl and sprinkle with the water, stirring to combine. Set aside. Whisk the flour, baking soda and nutmeg together in a medium bowl.
  2. Melt the butter in a large saucepan over medium heat. Take off the stove and add the sugar, syrup, vanilla and salt and stir well. Add the egg and beat in. Add the flour mixture, oats, nuts and coconut and stir just until combined.
  3. Cover the dough and let it stand at room temperature for a couple of hours, or ideally overnight in the fridge. This helps to moisten the oats thoroughly.
  4. Preheat oven to 350℉. Line baking sheets with ungreased parchment. Scoop 2 level tablespoons of dough for each cookie and flatten into a small hockey puck shape. Bake 10-12 minutes, just until cookies are golden on the edge. Slide parchment and cookies onto a rack to cool. Store airtight.

Friday, November 11, 2011

Almond Torte


Over 2 weeks have passed since my last post, but I am still having trouble getting into a blogging frame of mind. I find it really hard to find anything I want to bake, much less write about (I hate writing) and it doesn't help that it's getting dark at 4pm and I can't take photos. I haven't even been baking much, which means I probably should see the doctor. So, complaining aside, what's been on the menu? Lots of spicy food and this one lonely cake. I made it when a friend was coming for dinner. It was the perfect end to a simple meal, no adornment needed. If you like to gild the lily, raspberry coulis, candied sour cherries or any fresh or cooked fruit would make a wonderful accompaniment. This recipe is from a cookbook I've had since I was a teen, and I've been making almost that long, though I had forgotten about it for a few years. I simplified it by making the whole thing in a food processor, and I won't go back to the mixer for this cake, as the food processor does a much better job of breaking up the almond paste anyway. Yes, almond paste. Aren't you glad you kept reading? Try it--it's a moist and tasty cake, and a good keeper too.

Almond Torte
Source: Cooking A to Z
1¼ cups all-purpose flour
1 teaspoon baking powder
pinch salt
1 package almond paste (7 oz/200 grams)
¾ cup sugar
¾ cup unsalted butter
4 eggs
½ teaspoon almond extract

  1. Preheat oven to 350℉. Lightly grease bottom of a 9" cake pan; line with parchment. Grease sides of pan and parchment and dust with flour. Combine dry ingredients and set aside.
  2. Crumble almond paste into bowl of a food processor, add sugar and pulse until it looks like fine crumbs. Add butter and process until it is well creamed. Add eggs, one at a time, processing until each is well mixed before adding another. Add almond extract with the last egg. Scrape down sides of bowl. Add flour mixture and pulse a few times, until just combined. 
  3. Scrape batter into pan and bake until golden and a skewer inserted in the centre comes out clean. Start checking after 40 minutes, though it could take up to 50. Cool 10 minutes in pan, then remove and cool right-side up on a rack.

Thursday, October 27, 2011

The Daring Bakers Make Povitica (Walnut Swirl Bread)

I was so happy to get back into the swing of participating in Daring Kitchen challenges after missing a few! This recipe was just the kick in the pants I needed, though those pants may not fit for long if I keep picking at this bread. It is completely addictive, and I find myself wanting a slice at breakfast time, with tea in the afternoon and for dessert too. It's also a lot of fun to play with: by unraveling the spirals as I eat I can make a slice of this last for a long time. Not long enough, though: I offered about ⅔ of the loaf to a friend, but we haven't managed to meet up yet, and I am sorry to say that I started in on her share of the bread this afternoon. I plan to make another of these soon, so she may have to wait for that!

Complete challenge and recipe in this handy PDF. Make this and you'll be a hero. Thank you to Jenni of The Gingered Whisk for a fantastic challenge! See some of the other beauties in the Daring Kitchen slideshow (not sideshow).  

Blog-checking lines: The Daring Baker’s October 2011 challenge was Povitica, hosted by Jenni of The Gingered Whisk. Povitica is a traditional Eastern European Dessert Bread that is as lovely to look at as it is to eat!

Sunday, October 23, 2011

Pumpkin Flan

Right after I got home from Ecuador, I took my nephew up to my aunt and uncle's farm to get some pumpkins. We had different goals, James and I, but we both came home happy. He got a pumpkin 'big enough to fit Poppy (his sister) in', as well as some quality time admiring the tractors. I scored 15 pie pumpkins. My plan was to make pumpkin pie for Thanksgiving, but we were missing something crucial, though I can't remember what it was now. That left me with a cooked pumpkin, so I brought it home and got to work. I made a pumpkin loaf, which was delicious, but got eaten before the camera-computer issue got fixed. Then I made this, which is just like pumpkin pie filling without the crust, and with a caramel sauce. It's smooth, creamy, dense and pumpkiny. 
Pumpkin Flan
Serves 8 according to the recipe, but I think it's enough for at least 12--it's quite rich
Source: Adapted from Gourmet Today
2 cups sugar
1 cup heavy cream
1½ cups whole milk
5 large eggs
1 large egg yolk
15 ounces pumpkin puree (I used fresh, but this is equivalent to one can)
2 tablespoons dark rum
1 teaspoon vanilla extract
1 teaspoon ground cinnamon
1 teaspoon ground ginger
½ teaspoon freshly grated nutmeg
¼ teaspoon salt
a handful of pumpkin seeds for garnish (optional)

2-quart/liter souffle or round casserole dish (I used small ramekins)

Preheat oven to 350℉.

Caramel:
Heat 1 cup sugar with ¼ cup water in a heavy saucepan over medium heat, stirring until sugar is dissolved, brushing down the edges of the pan with a wet brush to rinse away any sugar crystals. Boil until it is a dark amber colour, then immediately pour into dish or dishes and swirl to distribute evenly. Set aside while you make the flan.

Flan:
Bring the cream and milk to a simmer in a heavy saucepan over medium heat (I used the same saucepan, and didn't bother to wash it--the hardened caramel with dissolve). Whisk the eggs, yolk and remaining sugar together until well blended. Add the pumpkin, rum, vanilla, spices and salt and whisk. Add the hot cream mixture in a stream while whisking. Pour mixture through a fine-mesh sieve into a bowl, pushing mixture with a spatula to force it through. Pour custard into caramel lined dish or dishes. Place into a large roasting pan, place pan in preheated oven and then pour boiling water to come at least halfway up sides of dish. Bake until flan is golden brown on top (small ones won't brown as much) and a knife inserted in the centre comes out clean, about 1¼ hours. Transfer dish to a rack to cool. Once cool, cover and refrigerate for at least 6 hours, overnight is even better. The longer it sits, the more caramel dissolves, giving more sauce.

To serve:
Run a thin knife around the edges of the flan to loosen it. Shake the dish gently until the flan moves freely in dish. Invert a large platter deep enough to catch the caramel sauce over the dish and, holding them tightly together, quickly invert and turn flan out on platter. Sprinkle with pumpkin seeds just before serving.

See you on Thursday with the Daring Bakers' reveal!

Monday, October 17, 2011

I'm back, with Rarotongan Coconut Rolls

Coconut bun with very special sauce
Hello! Is anyone out there? I have been back in Canada for 2 weeks now and am finally getting around to posting something. Unfortunately it's something I made before I left, but I am still having computer problems. I have a new hard drive, but iPhoto is not working properly, meaning no new photos, and no photos from Ecuador. Since returning, I haven't baked much, worked much or done much of anything. I just want to jump back on a plane (preferably without any airports involved) and be somewhere else, away from everyday responsibilities. That's not happening right this minute, so I'll post this and then head back to the computer shop so that I can share the results of pumpkinfest 2011. Brace yourselves.
Ready to rise
I have had this recipe bookmarked for ages and finally got around to making it in a fit of baking before I kissed my stove goodbye for 6 weeks. My family and I are huge fans of coconut, and my nephew likes to help too. While trying to entertain him at my mother's non-childproofed house, we gave him a coconut and a hammer. What followed was hilarious, with James chasing the coconut around the garage and swinging the hammer with abandon. I know, not safe, but nobody lost an eye, the kid was entertained and I got enough coconut to make these buns. Win-win, no?
Barely risen, hoping the oven spring will sort that out
Not exactly. More lose-win. I loved the coconut sauce and could see myself eating it on just about anything. I left it at my mother's and she was contemplating pouring it over ice cream. The buns, though, were a bit of a disappointment. They did not have the texture of yeast buns, but seemed more like bad biscuits or scones: heavy, with a dense crumb. I proofed the yeast, but they just did not rise much and the amount of liquid called for did not even make crumbs, much less a kneadable dough. There were comments noting this on the original recipe, so I can't say I wasn't warned. I'll be making these again, but using a different yeast dough recipe. Maybe this one from King Arthur Flour?
Baked, slightly risen, but look at that sauce!
Here's the link to the original recipe, from the lovely blog Pease Pudding.

Thursday, September 29, 2011

This Year's Raspberry Cream Cake


My family loves raspberry cream cake, and we used to get delicious ones at a local bakery. The last one we got was overpriced and underwhelming, so we've sworn off them and I occasionally remember to make one, usually when local raspberries are in season. I used to want to recreate that bakery cake, but I always end up making something completely different. That's okay, because I can still remember the other cake fondly while I'm gorging on raspberries, cake and cream. This one was exactly like the fraisier I made for the July Daring Bakers' challenge. Okay, not exactly. I used raspberries, skipped the almond paste and soaking syrup, and added lots of lemon zest to the cake batter. The verdict? Delicious.
Here's the link to that recipe because I'm far too lazy to type it up.
:)

Update: I am still not home! I'm enjoying my last week in Ecuador, and thinking of all the things I'll miss and making plans to return. I know my last post said I was on my way, but that was a mix-up on my part. I had lots of auto posts scheduled but the death of my computer while I was here buggered that up a bit. Anyway, enjoy some cake and I'll see you in a week or so!

Thursday, September 22, 2011

Raspberry and Honey Cranachan

This is my last auto-scheduled post, and I should be on a plane home by the time this is posted. I can't wait to get back to my own kitchen to bake up some Thanksgiving goodies!
I used red and golden raspberries, along with tayberries
Funny name, isn't it? Now, if I was one of those bloggers that did tons of research into how foods got their names, I'd have a story to tell. But I'm not that person. What I can tell you is that this dessert is Scottish and delicious. When I went to Edinburgh for work, this was one of the things on my to-do list. I wasn't sure how to pronounce it, but I knew that any combination of raspberries, cream, whisky and oats was bound to be amazing. I tried it in a few places just to confirm, because I do believe in some kinds of research. I even ate this combination atop hot oatmeal at a very cool spot at the Edinburgh Farmers' Market called Stoats Oats. It was a porridge bar where you could get any number of interesting toppings on your bowl of oatmeal. It was July, but freezing and pouring rain, so this was a Saturday morning treat. Here's the link to the breakfast dish, but I recommend you have the dessert version. This would also be delicious with stewed rhubarb (of course!) or other berries or cherries in season.

Raspberry and Honey Cranachan
Source: River Cottage Every Day
Serves 4
50 grams rolled oats
2 tablespoons whisky
250 ml double or whipping cream
2 tablespoons honey
250 grams raspberries
  1. Warm a small frying pan over low heat. Add rolled oats and stir until they are golden and toasted. Watch carefully as they burn easily. Transfer to a plate to cool.
  2. Stir the whisky and cream together and whisk until it holds soft peaks. Lightly crush a few of the raspberries so their juices run. I didn't crush them enough, so my cream was pale and full of whole berries. Not as pretty, but tasty. Fold all the raspberries, honey and oats into the cream, spoon into small glasses or bowls and serve immediately.

Thursday, September 15, 2011

Brownie Ice Cream Sandwiches

I love making ice cream, but I don't love eating it. I blame it on my brother. He hit me in the face with a Coke bottle when I was about 7 or 8 and broke my front tooth. It was so sensitive and I still think about it whenever I eat ice cream. So, when I make ice cream, I play with it a bit, and love making ice cream sandwiches. These ones are thin brownies. Brownies are cake's first cousin. Cake is my favourite thing to make. All that cancels out phantom tooth pain. Enjoy! I used the cherry ripple ice cream to fill these, but you could use any flavour you like. I'm thinking coconut for next time...
Brownie Ice Cream Sandwiches
From Chatelaine Magazine, August 2011
Makes 16

84 grams/3 squares unsweetened chocolate, chopped
⅓ cup unsalted butter, cubed
1 cup sugar
¼ teaspoon salt
¼ teaspoon vanilla
2 eggs
¼ cup all-purpose flour
2 litres ice cream of your choice
  1. Preheat oven to 350℉. Grease a rimmed 11"x17" baking sheet and line with parchment. Melt butter and chocolate together in a large saucepan over medium-low heat, stirring. Remove from heat. 
  2. Stir salt, sugar and vanilla into chocolate mixture, then whisk in eggs one at a time, until blended. Gently stir in flour, just until combined. Scrape onto prepared baking sheet and level with an offset spatula to make a thin, even layer.
  3. Bake in centre of oven until brownie appears shiny and is firm, but slightly undercooked, about 8 minutes. Remove from oven and cool in pan on rack. 
  4. Run knife around pan edges to loosen, then cut brownie in half lengthways, making 2 long rectangles. Peel off parchment and place one brownie top-side down on work surface. Now, if you were clever, you froze your ice cream in a shallow rectangular container. I wasn't, so I sliced mine 1" thick and laid the slices on the brownie and sandwiched it with the other, top-side up. Wrap in plastic and freeze for a few hours, until very firm.
  5. Unwrap and trim edges if desired, then cut into 16 rectangular bars. 

Thursday, September 8, 2011

Cherry Ripple Ice Cream

Can you resist giant baskets of cherries at the farmers' market? If so, you are a stronger person than me. I bring home as many as I can carry and mostly eat them fresh, as I prefer raw cherries to cooked, unless they are sour cherries. That's a whole other story for next year, as I missed them at the market this summer. Anyway, to use up some cherries, I made this ice cream and it was a big hit. And it was much better than the photo indicates, trust me!

Cherry Ripple Ice Cream
Adapted from delicious. magazine, July 2011
Makes about 2 litres/quarts

500 ml/2 cups milk (I used 2%)
6 large egg yolks
375 g sugar
450 g/1 pound cherries, pitted and quartered
30 ml/2 tablespoons fresh lemon juice
500 ml/2 cups whipping cream
almond extract to taste, I used a scant ½ teaspoon
  1. Bring the milk to a boil in a heavy saucepan. Meanwhile, beat the yolks and 200 g sugar together until pale and fluffy, a few minutes. Gradually stir in the milk, then return the mixture to the saucepan and stir constantly over medium-low heat until it thickens enough to coat the back of a wooden spoon. Pour into a bowl, cool, cover and chill thoroughly, preferably overnight.
  2. Combine the cherries, lemon juice and remaining sugar in a saucepan over low heat and let the sugar dissolve to make a syrup. Simmer for 25 minutes, or until the cherries are very tender. Scoop them out and boil the cherry liquid for a few minutes to thicken and reduce it. Add the cherries back in and chill. It should be thick and jammy.
  3. Add the cream to the ice cream base along with the almond extract. Freeze the mixture in an ice cream maker. Once ready, transfer the ice cream to a freezer-safe container. Dollop the cherries on top and swirl in with a spoon or spatula. You can decide how much rippling you want. I didn't swirl too much, as it was so hot the day I made this that it was melting incredibly quickly. Place in the freezer for a few hours to firm up.

Thursday, September 1, 2011

Coconut Ice Cream with Passionfruit Caramel


Remember those passionfruit caramel filled chocolates from my last post? They might have been a bit of a disaster, but the very happy outcome was that I got a great recipe for passionfruit caramel sauce. Not that this sauce was immune to the struggles I had that day. The recipe stated 'dark amber caramel' and I thought my caramel was amber but the end result was much too thin and pale. I used golden syrup instead of corn syrup, giving it a darker colour to start with, so this may have been the problem. However, golden syrup has so much more flavour than corn syrup, so it was worth having to boil the caramel for another 10 or 15 minutes after adding all the ingredients. It still wasn't thick enough at room temperature. Oh well. It was so delicious that I was really happy to have almost 500 ml left after making the chocolates. Even though I tested it almost every day, there was still enough left to do something with. I decided to make ice cream and stuck with tropical flavours to make a knockout combination. This is a simple and tasty ice cream, but it makes a very small batch. 2 cups was perfect for me, but you may want to double it.

Coconut Saffron Ice Cream
Source: Delicious Days by Nicole Stich, via David Lebovitz
1 cup coconut milk
⅔ cup whipping/heavy cream
¼ cup sugar
scant ½ teaspoon saffron threads
  1. Combine all ingredients in a saucepan and bring to a boil.
  2. Reduce heat and simmer for 10 minutes, stirring occasionally. Transfer to a small bowl and chill thoroughly.
  3. Churn in an ice cream machine, transfer to a sealable container and place in the freezer to firm up. 

Passionfruit Caramel Sauce
Source: Adapted from CandyBarLab by Lisa of Parsley, Sage, Desserts and Line Drives
Makes 3+ cups!

¾ cup + 2 Tablespoon (210 ml/7 oz/200 gm) passion fruit puree
1½ cups (360 ml/12 oz/340 gm) sugar
½ cup + 2 Tablespoon (180 ml/5 oz/140 gm) corn syrup (I used golden syrup--yum)
1¾ cups (420 ml) whipping/heavy cream
6 tablespoons (90 ml/3 oz/90 gm) unsalted butter


  1. Place the sugar, golden syrup and enough water so it’s like wet sand in a medium saucepan. Set over medium-high heat and stir to combine. Bring the mixture to a boil and cook until dark amber in color, about 5 minutes. Use a pastry brush, dipped in water, to wash down sides of pan to prevent crystallization as the mixture boils. Remove saucepan from the heat and gradually whisk in the passion fruit puree, heavy cream and butter. Transfer to a medium bowl and let cool.
  2. Serve warm or at room temperature with just about anything you can think of! I found this caramel sauce had a greasy mouthfeel when refrigerated, so I may skip the butter next time, and there will be a next time.


Saturday, August 27, 2011

The Daring Bakers Go Candy Crazy!

Greetings from Ecuador! By the time this is posted I will have been here for a week or so. I am working on a course training English teachers, and living in a very rustic setting on a Pacific Coast beach. I have heard that internet access (and electricity) can be intermittent, so I have scheduled posts for the next 6 weeks, and I'll check in as often as I can and post pictures if possible.
Update! My laptop's hard drive crashed and died the day after I arrived! Some of the posts I had scheduled, but hadn't attached the pictures yet, so I've postponed those till I get back and get a new computer. Sp now I will post about once a week, but will be back in October. Ecuador is gorgeous, by the way, and the food, especially the fruit, is amazing.
Dark chocolates with passionfruit caramel filling
This month's Daring Bakers' challenge was fantastic because it didn't require me to turn on the oven. This month's Daring Bakers' challenge was not fantastic because tempering chocolate was required. I'm sure I've whined about this before in this space, but I am not a big fan of chocolate. There's something about the texture I don't like and I'm not crazy about the flavour either, but I do like chocolate cake and other baked goods more than plain chocolate. And yes, I've had the good stuff! However, I do like a challenge, so I jumped in as soon as I had a free day. Unfortunately that free day was one where the temperature was higher than the temperature I had to bring the melted chocolate down too, causing me no end of trouble.
My sweaty chocolates after their sojourn in the freezer
First of all, I had a hard time finding a chocolate thermometer. I called a local cake decorating supply store and they assured me that they had one for the bargain price of $6.95. I drove through heavy traffic to discover that it wasn't a chocolate tempering thermometer and didn't go as low as I needed. After coming home and making a number of calls I found a store in the other direction that did have one. I got it, but it only has Fahrenheit on it, and I am hopeless with Fahrenheit. I can barely spell it, in fact. 
I chose a heavy glass bowl to melt the chocolate in, and I think this was the wrong choice for the season. It held the heat forever and meant the chocolate did not cool down. I couldn't remember the temperature range and kept running to the living room to check my laptop. Even though I am very patient, I ended up sticking it in the freezer at one point. In the end, I did get it tempered, but then I had to fill the *^*%&^ molds! I lined them with chocolate, then overfilled them with the delicious, but too thin, passionfruit caramel (more on that in my next post), meaning it was impossible to get a nice thin, even base on them. I ended up with a thick layer of chocolate on the bottom and all the chocolates joined together. I did not foresee the trouble that was to come. Can you? When I went to unmold the chocolates, the base snapped off most of them and the filling ran everywhere. Out of 26 chocolates only about 6 survived. The rest? Garbage! I went to mope on the sofa in frustration and discovered that I had obviously stepped in some melted chocolate and left chocolate footprints all over the apartment. Sigh. And I was only half finished the challenge...
Luckily for me and my floors, the next part of the challenge was a non-chocolate candy. Yay! There were so many things I wanted to try, but I picked up a basket of Coronation grapes one day, and while I was eating them and admiring their tart, concentrated flavour, I decided to make pâte de fruit with them to see if I could capture that essence in a candy. The answer is a resounding yes! Coronation grapes are the Canadian cousin to Concord grapes and they are in the markets and grocery stores in Ontario right now. They are dark purple-blue, thin skinned, tart, seedless and with a strong taste. This is the first time I have done anything with them other than eating them out of hand, as I can easily finish a basket in a day. These were perfect little bites: tart, with a great texture and the coating of sugar was a great and necessary contrast. I used this recipe. Pâte de fruit has a reputation for being tricky, but I had no troubles with this one, and in fact sat in the living room with a friend, chatting, and only occasionally stirring the boiling mixture. I am much better at that than being focused and precise!
Thanks to Lisa and Mandy for a fantastically challenging challenge! You can find the entire text of the challenge, along with photos, links and recipes here. Please check out the slideshow of the amazing creations by candy makers more daring than me! I'll miss the next Daring Bakers' challenge, but will be back for October. Cheers!

The August 2011 Daring Bakers’ Challenge was hosted by Lisa of Parsley, Sage, Desserts and Line Drive and Mandy of What the Fruitcake?!. These two sugar mavens challenged us to make sinfully delicious candies! This was a special challenge for the Daring Bakers because the good folks athttp://www.chocoley.com offered an amazing prize for the winner of the most creative and delicious candy!


Sunday, August 21, 2011

Apricot Jam

Do you like making jam or eating jam? Or do you like both? I love making jam, but I don't eat that much of it. This often leaves me with a surplus, unless I give all of it away. So, I tend to make jam every second year to give me time to use it all up. A friend told me recently that I don't eat it because I am 'suffering a toast shortage'. This is true. I rarely have bread in the house, but if I did, I'd eat nothing else, and cook not at all. Most of my jam ends up in yogurt, and I can eat dozens of jars of rhubarb jam this way. In fact, I hadn't planned to make any jam this year, but I saw a basket of beautiful apricots at the farmers' market a couple of weeks ago and couldn't resist. I actually don't like to eat apricots out of hand, but love them in pastries and in jam, of course. This was a very simple recipe, which made a tangy soft set jam, just the way I like it. I may not be eating it on toast, but I do see a Sachertorte in our future.
Apricot Jam
From the Williams Sonoma Book of Preserving
Makes 5-250 ml jars
3 pounds apricots
2 cups sugar
½ cup fresh lemon juice
  1. Pit apricots and slice thinly. Combine with sugar in a large pot and allow to macerate at room temperature for at least 4 hours. You can also refrigerate them overnight.
  2. Add lemon juice and bring to a boil, and cook for about 25 minutes, until thickened. Remember that the jam will be firmer when cool, so don't overcook.
  3. Ladle into hot, sterilized jars, cap, and process in a boiling water bath for 10 minutes. Any jars that do not seal can be kept in the fridge.


Sunday, August 14, 2011

The Daring Cooks cooked with me!


Last year, when Lis asked me if I would host a Daring Cooks' challenge, I had a moment of panic. I had no idea what to choose. I said 'yes' of course, then tried to narrow down the options. There were 3 challenges I had in mind, from 3 different continents. I think I chose the most 'daring' one, as I knew the appams would be unfamiliar to most of the members. I also didn't want to choose something that was too familiar, nor something that needed hours on the stove in the hot weather, eliminating my other 2 choices. Now, you may be wondering what appams are at this point. They are a stove-top flatbread made of rice and coconut milk and yeast and salt. That's it. That's all it takes to make a bread that is both thick and spongy and thin and crisp. They are simple and delicious and naturally gluten-free and vegan. The only thing you need is time to ferment the batter. Oh, and some delicious saucy dishes to accompany them! I made about a dozen dishes to prepare for this challenge, but only included some of the recipes and linked to others. By default, I called the accompaniments 'curry', but I think this may have been a turn-off to some Daring Kitchen members. It seemed that lots of people a) don't like 'curry' and b) think of it as a winter dish. What a shame, when there are so many different types and so many fresh flavours to explore!
Let me just show you in pictures what I made, then you can link to the (giant) challenge PDF for full recipes and links.
Cooking the batter in an appachati
In preparing for this challenge, I tried about 6 recipes for appams, using rice, rice flour, cream of wheat, a packaged mix, coconut meat, coconut milk and I don't know how many other variations. In the end, I decided on this recipe from Aparna of My Diverse Kitchen. It was the most reliable and used rice, cooked rice and coconut milk, all easily obtainable ingredients. Thank you Aparna!
You can even make them flower-shaped
To accompany the appams, I made a variety of dishes, some hot, some cold, with meat, fish, and vegetables. Here are some photos. You can find all the recipes in the pdf.
Carrots with Tropical Flavours
Baked Goan Fish with Fresh Green Chile Chutney
Eggplant Curry (see link)
Sri Lankan Beef Curry
Shrimp in Coconut Milk
Thanks so much to Lis and Ivonne and The Daring Kitchen for allowing me to host a challenge! A huge thank you also to those who participated and made some amazing-looking dishes. Be sure to check out the homepage for a slideshow of them. You can find many more photos and all the recipes and techniques here. Hmm, guess I need to include these blog-checking lines:

Blog-checking lines: Mary, who writes the delicious blog, Mary Mary Culinary was our August Daring Cooks’ host. Mary chose to show us how delicious South Indian cuisine is! She challenged us to make Appam and another South Indian/Sri Lankan dish to go with the warm flat bread.

Tuesday, August 9, 2011

Berry Galette

Do you have a dessert that you make regularly? Or do you flit from one recipe to the next? I do a bit of both but more often I make something for a while, then completely forget about it. This galette is a good example of that. I've been making it since Baking with Julia was published in 1996, but these days I am always trying something new and it got pushed aside. What a shame, as this is a beautiful dough to work with, even if you are not fond of making and rolling out pastry. It comes together quickly in the food processor and stays soft enough to roll easily, even right out of the fridge. Fill it with any sort of berries you like (except strawberries--too watery), stone fruit or even pineapple chunks. 
Galette Dough
From Baking with Julia, contributing baker Flo Braker
Makes 2 large or 8 small

3 tablespoons yogurt/buttermilk/sour cream
about ⅓ cup ice water
1 cup all-purpose flour
¼ cup cornmeal
1 teaspoon sugar
½ teaspoon salt
7 tablespoons cold unsalted butter, cut into 6 to 8 pieces
  1. Stir the yogurt and ice water together and set aside. Put the flour, cornmeal sugar and salt in a food processor and pulse to combine. Add the butter and pulse 8 to 10 times, or until the mixture is speckled with butter pieces. With the machine running, add the yogurt mixture and process just until the dough forms soft, moist curds.
  2. Divide the dough into 2 or 6 pieces and press each into a disc. Wrap and chill for at least 2 hours. It can also be frozen and thawed in the fridge.
Berry Galette

½ recipe galette dough


1½ cups mixed fresh berries (I used raspberries, blackberries and blueberries)
1 tablespoon + 1 teaspoon sugar
1 tablespoon cold unsalted butter (I usually omit this, preferring to serve it with scads of whipped cream)
  1. Preheat oven to 400℉/200℃. Line a baking sheet with parchment paper.
  2. Roll the dough on a lightly floured surface until it is about ¹⁄₈"/0.3cm thick. The dough is soft and easy to roll, but lift and turn it and add more flour if necessary so that it doesn't stick. Transfer to the parchment lined baking sheet.
  3. Place the berries on top and sprinkle with the 1 tablespoon sugar. Fold the uncovered border of dough up over the edge of the berries, allowing it to pleat. Dip a pastry brush in water and coat the edge lightly, then sprinkle with sugar (I used a mixture of coarse decorating sugar and chopped pistachios).
  4. Bake the large galette for 35-40 minutes, and the smaller ones for about 25 minutes, or until the pastry is golden and crisp and the berry juices are starting to run. Place the baking sheet on a cooling rack and cool for about 10 minutes before sliding it off the parchment to continue cooling.
  5. Serve warm or at room temperature. This is best the day it is made.
See you on the 14th for my Daring Cooks' Challenge reveal! 


Wednesday, August 3, 2011

Strawberry Mirror Cake for Poppy

I'm back! Sort of. Well, not really. Hmmm. Not sure. I've been back from Toronto for about 5 days and have spent most of that time hanging out with my niece and nephew. Fun! Except when you are looking after a 3-year-old with some sort of nasty stomach bug and you catch it by the end of the day. What a sorry pair we were by the time his mom got home.
So, I'm not in Montreal, as that was cancelled very last minute. I'm still planning to go for a long weekend, though, as we have tickets to the tennis final (Go Nadal!). With my intermittent internet access I've been trying to sort out another short contract for the end of August and had to spend yesterday getting my passport renewed (oh, the photos are awful--why won't they let you smile?) and shopping for tickets. I do enjoy the search for contracts and plane tickets, though I'm glad I don't have to do it nearly every month, like I did for a few years.
Anyway, that's my excuse for not posting much recently, and for not visiting any of you dear readers. Are there any of you left? More apologies, for the poor photos: I took these at my mother's where the light is either blindingly bright or non-existent. I haven't even got a recent recipe for you--I made this cake in June, when strawberries were at their finest. It's 2 layers of sponge with a kirsch syrup surrounded by strawberry mousse and topped with a fresh strawberry mirror. It was fairly easy, as the components were all quite simple and there was lots of refrigeration time in between. We loved it. And who is Poppy, you may be wondering? She's my niece, who turned one in early July.


Friday, July 29, 2011

Citrus-berry terrine

Not sure what I can tell you about this, except that it was delicious! I made a half recipe sometime back in June, with oranges and an assortment of berries and enjoyed it for dessert with whipped cream, for breakfast (it's just fruit after all) and probably for lunch too, as I needed to clean out the fridge before leaving town. I may even have had it for a midnight snack if the photos of it sliced are any indication. So, you get the big picture and the end piece, okay? 
This is a French Fridays post--we don't publish recipes. Thanks to Laws of the Kitchen for being in a much earlier time zone--I was avoiding packing last night and saw her post, which reminded me to put my own up.