Showing posts with label chocolate. Show all posts

Saturday, August 27, 2011

The Daring Bakers Go Candy Crazy!

Greetings from Ecuador! By the time this is posted I will have been here for a week or so. I am working on a course training English teachers, and living in a very rustic setting on a Pacific Coast beach. I have heard that internet access (and electricity) can be intermittent, so I have scheduled posts for the next 6 weeks, and I'll check in as often as I can and post pictures if possible.
Update! My laptop's hard drive crashed and died the day after I arrived! Some of the posts I had scheduled, but hadn't attached the pictures yet, so I've postponed those till I get back and get a new computer. Sp now I will post about once a week, but will be back in October. Ecuador is gorgeous, by the way, and the food, especially the fruit, is amazing.
Dark chocolates with passionfruit caramel filling
This month's Daring Bakers' challenge was fantastic because it didn't require me to turn on the oven. This month's Daring Bakers' challenge was not fantastic because tempering chocolate was required. I'm sure I've whined about this before in this space, but I am not a big fan of chocolate. There's something about the texture I don't like and I'm not crazy about the flavour either, but I do like chocolate cake and other baked goods more than plain chocolate. And yes, I've had the good stuff! However, I do like a challenge, so I jumped in as soon as I had a free day. Unfortunately that free day was one where the temperature was higher than the temperature I had to bring the melted chocolate down too, causing me no end of trouble.
My sweaty chocolates after their sojourn in the freezer
First of all, I had a hard time finding a chocolate thermometer. I called a local cake decorating supply store and they assured me that they had one for the bargain price of $6.95. I drove through heavy traffic to discover that it wasn't a chocolate tempering thermometer and didn't go as low as I needed. After coming home and making a number of calls I found a store in the other direction that did have one. I got it, but it only has Fahrenheit on it, and I am hopeless with Fahrenheit. I can barely spell it, in fact. 
I chose a heavy glass bowl to melt the chocolate in, and I think this was the wrong choice for the season. It held the heat forever and meant the chocolate did not cool down. I couldn't remember the temperature range and kept running to the living room to check my laptop. Even though I am very patient, I ended up sticking it in the freezer at one point. In the end, I did get it tempered, but then I had to fill the *^*%&^ molds! I lined them with chocolate, then overfilled them with the delicious, but too thin, passionfruit caramel (more on that in my next post), meaning it was impossible to get a nice thin, even base on them. I ended up with a thick layer of chocolate on the bottom and all the chocolates joined together. I did not foresee the trouble that was to come. Can you? When I went to unmold the chocolates, the base snapped off most of them and the filling ran everywhere. Out of 26 chocolates only about 6 survived. The rest? Garbage! I went to mope on the sofa in frustration and discovered that I had obviously stepped in some melted chocolate and left chocolate footprints all over the apartment. Sigh. And I was only half finished the challenge...
Luckily for me and my floors, the next part of the challenge was a non-chocolate candy. Yay! There were so many things I wanted to try, but I picked up a basket of Coronation grapes one day, and while I was eating them and admiring their tart, concentrated flavour, I decided to make pâte de fruit with them to see if I could capture that essence in a candy. The answer is a resounding yes! Coronation grapes are the Canadian cousin to Concord grapes and they are in the markets and grocery stores in Ontario right now. They are dark purple-blue, thin skinned, tart, seedless and with a strong taste. This is the first time I have done anything with them other than eating them out of hand, as I can easily finish a basket in a day. These were perfect little bites: tart, with a great texture and the coating of sugar was a great and necessary contrast. I used this recipe. Pâte de fruit has a reputation for being tricky, but I had no troubles with this one, and in fact sat in the living room with a friend, chatting, and only occasionally stirring the boiling mixture. I am much better at that than being focused and precise!
Thanks to Lisa and Mandy for a fantastically challenging challenge! You can find the entire text of the challenge, along with photos, links and recipes here. Please check out the slideshow of the amazing creations by candy makers more daring than me! I'll miss the next Daring Bakers' challenge, but will be back for October. Cheers!

The August 2011 Daring Bakers’ Challenge was hosted by Lisa of Parsley, Sage, Desserts and Line Drive and Mandy of What the Fruitcake?!. These two sugar mavens challenged us to make sinfully delicious candies! This was a special challenge for the Daring Bakers because the good folks athttp://www.chocoley.com offered an amazing prize for the winner of the most creative and delicious candy!


Thursday, May 26, 2011

The Daring Bakers overdose on chocolate!


Daring Bakers around the world hover on the website on the first of the month, refreshing their screens to find out what the month's challenge is. Or is that just me? I'm not sure why I want to find out what the challenge is on the first day, as I rarely complete it until shortly before the deadline, but maybe it's because I'm insatiably curious about almost everything. Once I find out the challenge, I do nothing. For weeks, sometimes. Not this time, though: I made this challenge early, even though I wasn't very excited about it. You see, I don't love chocolate and this was a rich chocolate mousse, with torched meringue, creamy caramel sauce and sugar-coated nuts. Oh, and the recipe was enormous! It called for 11 eggs and made 18 servings and needed some last-minute attention, so wasn't something I wanted to make for a crowd. What's a girl to do? Get out her calculator and divide the recipe by 11, of course! It made for some ridiculously small quantities, but only took me about 15 minutes to whip up.  It made 3 servings, meaning I would have got over 50 from the original recipe. That's a lot of chocolate mousse.

I knew that I wouldn't enjoy more rich and creamy accompaniments with this, so I went with candied sour cherries and kirsch. Frozen sour cherries have been my sour fruit stand-in from January when I ran out of rhubarb and even though my fridge is bulging with rhubarb right now, I'm still on a sour cherry kick. I made a quick candied cherry recipe from David Lebovitz, reducing the water and adding a few tablespoons of kirsch. For the nuts, I used green almonds, but didn't like them much. They were sour, but are a taste I haven't acquired yet. Maybe that's why I forgot to put them on the plate and left them on the counter instead, only noticing them when I took the empty marquise plate in to the sink. You'll find a picture below. The meringue was a great excuse to dust off my blowtorch, and its sweetness was a nice foil to the mousse and cherries. I hadn't used my blowtorch since making the amazing roasted marshmallow ice cream sandwiches last year. The verdict? I liked it, but found it incredibly rich. I kept going back for another taste until it was all gone. This was a dangerous thing to have in the freezer, and I'll definitely keep it in mind for my chocolate-loving friends.
green almonds
Many thanks to Emma and Jenny for the challenge! I certainly wouldn't have made this otherwise, and if it weren't for the Daring Bakers and Tuesdays with Dorie, this blog would be made up entirely of rhubarb and cardamom recipes! Though I do have a few kilos of rhubarb in the fridge...

Original challenge and recipe PDF.

Blog-checking lines: The May 2011 Daring Bakers’ challenge was hosted by Emma ofCookCraftGrow and Jenny of Purple House Dirt. They chose to challenge everyone to make a Chocolate Marquise. The inspiration for this recipe comes from a dessert they prepared at a restaurant in Seattle.


Sunday, April 3, 2011

German chocolate cake

Greetings from Toronto! I am here for a month to work on a short contract, but I have neither a kitchen or my camera, so I'm hoping to have time to share all the things I made last month and didn't get around to posting. I was actually expecting to catch up on responding to comments on the train here, but there was a problem and we had to travel by bus instead. Now, I don't romanticize the train, but it is a hell of a lot more comfortable than a bus. And it has wireless internet. And food that doesn't make you feel nasty the entire next day. Enough about that, I seem recovered now and ready for cake.

I made this for my brother's birthday. Like me, he is not a chocolate fanatic, but he does love coconut. That's what I told myself anyway, as I've been wanting to make this cake for a while. My mother used to make it for us when we were kids and I don't think I'd had it since. My plan was to use a recipe from America's Test Kitchen via Leite's Culinaria, but there were a few comments about the cake being dry, so I made one from Rose's Heavenly Cakes instead. Not only was it dark, moist and absolutely delicious, it used up a couple of extra egg whites, and I always have those around. The cake has a fairly light texture and stays soft even when cold, though our cake didn't last long enough to need refrigeration. It was huge, so if you can make yours last more than a day or two, keep it covered in the fridge and bring to room temperature to serve.
Cake
Source: Rose's Heavenly Cakes
¾ cup plus 2 tablespoons (2.3 oz/66 grams) Dutch-processed cocoa
½ cup (4 oz/118 grams) boiling water
½ cup (3.7 oz/108 grams) canola oil (I used grapeseed)
4 large eggs, separated, plus 2 egg whites, at room temperature
1 teaspoon vanilla extract
¾ cup (2.6 oz/75 grams) cake flour
⅔ cup (2.6 oz/75 grams) all-purpose flour
1½ cups (10.6 oz/300 grams) superfine sugar
2 teaspoons baking powder
1 teaspoon baking soda
¼ teaspoon salt

Preheat oven to 350℉/175℃. Grease only the bottoms of 2 9" round cake pans and line them with parchment. Cake strips are recommended for the most even cakes, but I didn't use them and it was fine. I also didn't use a stand mixer, just a hand mixer and slightly higher mixing speeds than those noted below.
  1. In a large mixing bowl, whisk the cocoa and boiling water until smooth. Cover with plastic wrap and cool to room temperature. Add the oil and the yolks to the bowl. Start on low speed, then beat on medium for about 1 minute, or until mixture is shiny and looks like buttercream. Scrape down the sides of the bowl. Add vanilla and beat briefly. 
  2. Whisk the dry ingredients together (including the sugar), then sift half the mixture over the cocoa mixture. Beat on low speed until moistened. Scrape down the sides of the bowl and repeat with the remaining dry ingredients. Raise the mixer speed to medium-high and beat for 1 minute. The mixture will be very thick. On low speed, add the egg whites. Gradually raise the speed to medium-high and beat for 2 minutes. The batter will be like thick soup. Divide the batter evenly between the pans (17.5 oz/495 grams) in each.
  3. Bake for 25 to 35 minutes, or until a wooden skewer comes out clean, and the cakes spring back when pressed gently in the centre. During baking, the batter will rise almost to the top of the pans and be domed in the middle, but this will lower just before they are ready. Right after removing the cakes from the oven, run a knife around the edge of the pan and unmold onto a cooling rack. Remove parchment and re-invert so cakes can cool right side up.

For the topping, I went with the recipe from Leite's, as it just looked better and used evaporated milk instead of condensed, meaning I didn't need to make another trip to the grocery store. I had extra, as I didn't cut my cake into 4 layers. It'd make a great topping or filling for cakes, cookies or cupcakes, if you don't eat it all with a spoon.
Coconut-pecan topping
4 large egg yolks
One 12-ounce can evaporated milk
1 cup granulated sugar
1/4 cup packed light brown sugar
6 tablespoons unsalted butter, cut into 6 pieces
1/8 teaspoon salt
2 teaspoons vanilla extract
2 1/3 cups sweetened shredded coconut
1 1/2 cups (finely) chopped pecans, toasted 

1. Whisk the yolks in a medium saucepan; gradually whisk in the evaporated milk. Add the sugars, butter, and salt and cook over medium-high heat, whisking constantly, until the mixture is boiling, frothy, and slightly thickened, about 6 minutes.

2. Transfer the mixture to a bowl, whisk in the vanilla, then stir in the coconut. Cool until just warm, cover with plastic wrap, and refrigerate until cool or cold, at least 2 hours or up to 3 days. (The pecans are stirred in just before cake assembly.)

To assemble cake:
  1. Stir pecans into filling. Slice layers in half horizontally, using a serrated knife, if desired. Top each layer with a generous amount of filling and top with another cake layer. Spread more filling on top of cake. 

Sunday, March 27, 2011

The Daring Bakers make meringue filled coffee cake


I haven't got a lot of time today, but I wanted to share these pictures with you. When I first looked at the challenge, I wasn't so sure about it. I love making yeast breads, but the idea of putting a meringue inside one wasn't all that appealing. So, I went on to bake other things, and only remembered about the challenge with a week to go. One of my friends reminded me. Friends and family take a very healthy interest in these challenges!
Apricot in the front, lemon at back. 
Last Sunday morning I made the dough, and it was as silky and easy to work with as promised. I made a half recipe and divided into two small loaves. For fillings, I made one with the meringue and lemon curd and roasted almonds. Rolling this mixture up was a bit like trying to change a squirming baby. There were slips and leaks galore. The second one I filled with apricot leather from Syria, called amardeen. It's tart and tangy, but not very flexible, so rolling the dough around this and the meringue, chopped bittersweet almonds, whole cardamom seeds and more roasted almonds was another challenge.
The lemon curd coffee cake, before I attempted to roll it
In the end, both loaves were tasty, but the apricot one was the clear favourite. The amardeen softened up to a firm, jelly-like texture which, combined with the dark chocolate, crunchy almonds and surprise bits of cardamom was perfect in every way. It didn't rise as much as the lemon one, I think because the amardeen did not stretch or give, but it didn't matter one bit. The lemon one was good, and stayed moist for at least 4 days, but the nuts softened up and it just wasn't as interesting as the other one.
Filling:
amardeen, cut (with scissors) to 1"/2.5cm smaller than the rolled out dough
chopped bittersweet chocolate and chopped toasted almonds, enough to generously cover the meringue
cardamom seeds from 2 pods (use 4 if making a full recipe)
The amardeen, before adding more meringue, chocolate and nuts.
Spread dough with a thin layer of meringue and centre amardeen on it. Cover with remaining meringue and sprinkle nuts, chocolate and cardamom over. Roll, making sure you are holding one edge of the amardeen, as it is reluctant to roll. Seal bottom and lay on parchment lined baking sheet. Slash every inch or so, using a very sharp knife and making sure you cut the amardeen as well as the dough. Let rise and bake as directed. See challenge PDF here for recipe.
Thanks very much to Ria and Jamie for a great challenge. I'll be making this again and I have more filling ideas. I always have ideas, and just need to work on finding time and more hungry mouths to feed!

Blog-checking lines: The March 2011 Daring Baker’s Challenge was hosted by Ria of Ria’s Collection and Jamie of Life’s a Feast. Ria and Jamie challenged The Daring Bakers to bake a yeasted Meringue Coffee Cake.

Thursday, March 17, 2011

Sheridan's Black and White chocolate pudding for St Patrick's Day


Do we really need a dessert for St Patrick's Day? No, Guinness is not a dessert. Anyway, last year I made some coffee gelee and topped it with cream in a tiny beer glass. This year, I had lots of ideas, but no time. So, I decided on a rich chocolate pudding. It was made in about 10 minutes flat. Now, I am not a huge fan of chocolate pudding, and much prefer custard, but I thought I'd give it another try. I had tried a vanilla pudding a few months ago and found it too starchy, but hoped the chocolate and booze would fix that. I adapted the recipe from this one, where hundreds of commenters raved about it. I read a lot of the comments and they fell into a few categories: those that loved it; those that couldn't get the pudding to thicken; and the disturbing ones. They made weird substitutions like Cool Whip for milk, breast milk, artificial sweeteners, or they had really odd ideas about food chemistry. I don't know why I torture myself by reading comments, but sometimes it's like a car crash and you just can't look away. At least I can't: I'm nosy.

I added some Dutch-process cocoa and used 72% chocolate here. I was glad I was adding the liqueur at the end, as was very thick, even while hot. If you're skipping the alcohol, reduce the cornstarch a bit, or replace it with another liquid to get a wonderful, silky soft pudding. Have you ever tried Sheridan's? It comes in two colours that are separate, but in a fused glass bottle. The black is whiskey-coffee and the white is creamy vanilla. When you pour it, you get a layered drink. And it tastes much better than Bailey's, I think. I put the black in the pudding and the white in the cream top. Hmmm, in looking for photos of Sheridan's, I see that it is hard to find in the USA. Feel free to replace with whiskey and Bailey's.

Sheridan's Liquor
Source: Tipsy Gifts

Black and White chocolate pudding
Makes 4-6 servings
Black:
1/4 cup cornstarch
1/2 cup sugar
large pinch salt
2 tablespoons darkest Dutch-process cocoa
3 cups whole milk
6 ounces dark chocolate, melted (I used 72%)
4-6 tablespoons Sheridan's black liqueur
White:
1/2 cup whipping cream
2 tablespoons Sheridan's white liqueur

Black: Whisk dry ingredients together in a medium saucepan and then slowly whisk in milk until smooth. Cook over medium-low heat, whisking constantly, until pudding just comes to a boil. Whisk for one minute. Remove from heat and whisk in melted chocolate and liqueur. Strain through a sieve and divide amongst serving dishes. Cover with plastic wrap and refrigerate for at least 30 minutes.
White: Whisk cream and liqueur together until soft peaks form. Serve puddings with a dollop of cream.

Friday, January 21, 2011

Chocolate beet cake

Pudding. That's all I want to eat these days. Rice pudding, tapioca pudding, maybe even bread pudding. I even made a cornstarch based vanilla pudding, but it was too starchy for me. I like custardy puddings best, and would be quite happy with baked custard and more crème caramel. So, maybe I'll be back in a few days with a pudding, but for now I've made you a cake. The quest for beet cake started back in October when I first moved. My mother gave me a large bag of beets and I was looking for ways to use them. I made one, but wasn't completely happy with it, so the draft of that post languished until the other day when I had more beets to use up. Yes, they were from my mother again. She likes to send me home with iron-rich foods. Thanks, Mom.

Oh, and guess what? I got a brand-new stove! I got home the other day, and there it was. So far, so good. The temperature is spot-on, and it goes up to 500℉, which is 100℉ hotter than my old oven, and means I can make great pizza and bread again. In fact, I've already made pizza, but I ate it all up, alongside some celery soup, which is my new favourite soup. My old oven was probably donated to a museum, or maybe you can see one just like it on an old episode of Happy Days. I'm hoping the new stove shakes me out of my blog ennui. I just don't feel like making much these days, and can never find the time to take pictures or write about what I make. Work has been busy and daylight is hard to find. Also, puddingy things are not the most photogenic desserts, at least not in my hands.

Anyway, I went looking for a beet cake recipe online, and found a few, but none of them were quite right. One used 2½ cups of oil for 2-9" layers, which seemed like an awful lot. Another one used chocolate, which I didn't have on hand (it's also in Portuguese, but that's not a big problem: I speak food rather well). The third one used just a little chocolate and spice, so that wasn't it either. Still another one used raw beets, but I had already roasted mine, and had no intention of buying more. So, slightly disappointed that I didn't have a Goldilocks moment, I decided to wing it. That's not as hard as you might think, especially if you understand the interactions between ingredients and what purpose they serve in a baked good. Some folks, especially non-bakers, think of baking as chemistry, where everything has to be just so for it to work. That's just not true! You may not get a prize-winner on your first try, but something made with lots of butter, sugar, eggs and flour will only rarely be a total fail. Here's how I went about developing this recipe:
  • I wanted to use oil, as in a carrot cake, for moistness. I also didn't think the taste of butter would come through with all the cocoa and the beets. Oh, and I had bought 2.5 litres for the doughnut challenge
  • I had no chocolate, only cocoa
  • I was having trouble getting a fine enough puree of beets on their own, so I knew I needed to add something else to the food processor. Buttermilk and cocoa make a great cake, so I went with that. And I had found a litre of it in the back of the fridge. Expiry date today!
  • I like brown sugar in chocolate cakes, so I used it
  • Buttermilk and brown sugar are acidic, meaning that baking soda would be a good addition. I also added baking powder. Think of it as leavening insurance
  • Usually when I make up recipes I don't measure anything, but I did this time. I used my scale because it was easier to see the proportions of ingredients. Sorry, no cup measurements this time!
Go ahead, pile on the whipped cream! You're having beets for dessert.

Chocolate Beet Cake (Updated, based on my friend Judy's results and my 3rd remake)

200 grams all-purpose flour
75 grams Dutch-process cocoa
½ teaspoon salt
1 teaspoon baking powder
½ teaspoon baking soda
200 grams brown or white sugar
200 grams cooked beet
½ cup water
100 grams buttermilk (or yogurt, or sour cream)
2 eggs
150 grams oil

  1. Preheat oven to 350℉/180℃. Grease a 10” pan and line with parchment.
  2. Sift together flour, cocoa, baking powder, baking soda and salt.
  3. Puree beets and buttermilk until smooth. Add eggs, brown sugar, cocoa mixture and oil and combine well. (I just put all this in the food processor and liquified it)
  4. Pour over dry ingredients and whisk to combine. Do not overmix.
  5. Scrape into pan and bake for 30-40 minutes, until a toothpick comes out clean. (May take longer)
  6. Cool in pan on rack, then turn out of pan. Dust with icing sugar and serve with whipped cream.
The verdict? Well, the top was very cracked, but it was very moist, chocolaty and fudgy. It doesn't taste of beets at all. I found it perfect with whipped cream and a cup of coffee.
This is the first one I made, back in October. It had more cocoa, no water,
less oil and a fussier preparation. It looks much the same as version 2 though.

Tuesday, December 28, 2010

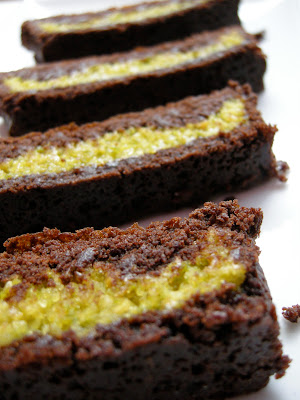
Pistachio marzipan brownies

I hope everyone had a wonderful Christmas, if that's your sort of thing. I have been taking my 2 weeks of vacation very seriously, and have only baked a few pies and a birthday cake. I made this confection above the week before Christmas, and have been wanting to tell you about it, but couldn't find the time in the holiday mayhem. I'm not really sure what to call this, but the texture of the chocolate part was fudgy, with crispy edges, and the pistachio marzipan was rich and delicately flavoured. Together, they were outstanding, and I'm not even a chocolate fanatic.
I adapted this recipe from the gevulde speculaas, or spice cake with almond paste I made last month, by substituting Dutch-processed cocoa for some of the flour and making a sweetened pistachio paste from the fabulous, fresh Iranian pistachios available just down the street. I omitted the spices, but I bet a chocolate spice version would be fantastic. I baked it in a rectangular tart pan, but a round cake pan would also work well. Blanching and peeling the pistachios was a time-consuming business, but the end result was so worth it. Umm, that's a lot of 'buts', but I can't think of any other words right now. Bear with me. The brownies kept well in a covered container for well over a week, though I cut a small slice every time I walked by. 
Pistachio marzipan brownies
Adapted from Warm Bread and Honey Cake

1⅓ cups all-purpose flour
⅓ cup Dutch-process cocoa
½ teaspoon baking powder
¼ teaspoon salt
7 oz/1 cup brown sugar
6 oz/¾ cup unsalted butter, chilled and cubed
1 egg, well beaten
Filling
10½ oz pistachio marzipan (I made my own, see below)
about ½-¾ of a beaten egg (reserve the rest for glazing)
  1. Combine flour, cocoa, baking powder, salt and sugar in a food processor and pulse to combine. Add the butter and pulse until it resembles breadcrumbs. Add the beaten egg and run the food processor until the dough comes together. Try not to eat all the dough. Divide the dough into ⅓ and ⅔ portions, shape in discs, wrap separately in plastic and refrigerate. Chill for one hour. It can be made the day before, but will need to warm up before rolling to prevent it from breaking up.
  2. Preheat oven to 340℉/170℃  and grease a 9" cake pan, or a 13"x4" tart pan.
  3. Mix the pistachio paste with enough beaten egg to make a fairly soft, spreadable filling. Set aside. Roll out the larger portion of dough between 2 pieces of plastic wrap until it is about 1" larger than your pan on all sides. Make sure there are no creases in the plastic wrap. Use this piece of dough to line the pan, pressing it to the sides of the pan so it doesn't fall inward. Spread the pistachio paste evenly over the dough and fold in the dough edges so they rest on it. Reuse the plastic wrap to roll the smaller piece of dough into an 8½" circle. It should be slightly smaller than the cake pan. Trim it so the edges are neat. Moisten the edges of the dough in the pan and lay the smaller circle on top. Press the edges gently together to seal. Brush with the leftover beaten egg and prick with a fork in several places.
  4. Bake for 30-35 minutes. Leave to cool in the pan, then transfer carefully to a serving plate. If you can stand it, wrap this and let it sit for a day or two before serving for best flavour.
Pistachio marzipan
10 ounces/283 grams shelled pistachios
7 ounces/200 grams granulated sugar
2 egg whites

This was rather labour-intensive, so if you can find shelled, blanched pistachios, it'll be worth it. Otherwise, pick up about twice the weight of pistachios in the shell.
  1. Bring a large pot of water to a boil, add pistachios and blanch for 30 seconds to one minute. Test one by running it under cold water and seeing if the reddish skin comes off easily. If so, drain and rinse with cold water. Now, one by one, squeeze the pistachios to remove the skin. This is what keeps the marzipan bright green. Once they are all skinned, place on a towel-lined baking tray and allow to dry for at least 3 hours. Do not dry in the oven, as the colour may fade.
  2. Combine pistachios and sugar in a food processor and grind as finely as desired. I leave mine with a bit of texture.
  3. Add egg whites and process until well blended. Scrape into a container and refrigerate or freeze. This keeps well, and is best made in advance. 
Clockwise from top: pistachios in shell, shelled, blanched, marzipan
Oh, and here's the last slice of my mother's birthday cake: one for the baker!


Wednesday, December 1, 2010

Ad Hoc chocolate chip cookies

Are you always in search of the ultimate chocolate chip cookie recipe? It seems to me, from wasting time online my extensive research, that folks want a very chewy cookie. Caky is bad. Too thin and crisp is usually bad. So, basically we are looking for warm cookie dough, I think. Have I got my finger on the pulse of chocolate chip cookie lovers? Or is that a bit too personal?
Anyway, I was looking for something to make for the Ottawa Foodies potluck that happened recently. I had to work that morning, so it couldn't be too elaborate. It needed to be portable and not require any serving utensils, because I was too lazy to bring my own. So, cookies it was. I made a double batch of dough the night before and finished baking them seconds before I ran out the door, only an hour late. After reading Valerie's post on the cookies I decided to reduce the flour by a fair bit, as I did want the chewiest cookies possible. That made my cookies much flatter than hers, but I loved the texture, even a couple of days later. Yes, I kept tasting in the service of sharing my findings with you. I'm unselfish that way.
I froze the leftover dough and baked them to send to a friend for her birthday. I underbaked them, hoping they'd still be somewhat soft when Canada Post finished mangling them. Amazingly, they survived the journey. This batch wasn't as flat as the first batch, but the only picture I got were of the ones I forgot in the oven and didn't mail! They are brown and crisper, but still very good.
The overdone batch: dark and crispy
Oh, and what is with cookie yields? This recipe apparently makes 30 3-inch cookies, and I doubled it, expecting 60 or so. I used EXACTLY the measure called for and got about 100. Here's the recipe:

Chocolate chip cookies
from Ad Hoc at Home, by Thomas Keller


2⅓ cups plus 1 tablespoon all-purpose flour
¾ teaspoon baking soda
1 teaspoon kosher salt
5 ounces 55% chocolate, cut into chip-sized pieces (about 1¼ cups) I replaced this with milk chocolate
5 ounces 70 to 72% chocolate, cut as above  I used 72%
8 ounces cold unsalted butter, cut into small pieces *
1 cup packed dark brown sugar, preferably molasses sugar. I added a dollop of molasses to brown sugar
¾ cup granulated sugar
2 large eggs
Vanilla--not in recipe, but I couldn't help adding it


*I just noticed the 'cold' as I was typing. Maybe that's why mine were flatter. Oops.

For chewier cookies, instead of underbaking them, Keller recommends misting them with water before baking. I tried it, but couldn't tell the difference between those and the unmisted ones, so didn't bother after the first tray.

Preheat oven to 350℉. Line 2 baking sheets with Silpats or parchment.
Sift the flour and baking soda together and stir in the salt.
Put the chopped chocolate into a fine-mesh strainer and shake to remove any chocolate 'dust'.
Beat half the butter until fairly smooth. Add both sugars the remaining butter, and beat until well combined, then beat for a few minutes, until the mixture is light and creamy. Scrape down the sides of the bowl. Add the eggs one at a time, beating until the first one is incorporated before adding the next, and scraping the bowl as necessary. Add the dry ingredients and mix on low speed to combine. Mix in the chocolate, and fold with a spatula to ensure that the chocolate is evenly incorporated.
Using 2 level tablespoons per cookie, shape the dough into balls. Arrange 8 cookies on each pan, leaving about 2 inches between them, as dough will spread. Bake for 12 minutes, or until the tops are no longer shiny, rotating pans and switching racks if you are baking 2 trays at once.
Cool the cookies on the pan on cooling racks for about 2 minutes to firm up a bit, then transfer to a rack to cool completely.
The dough or shaped cookies can be refrigerated for up to 5 days or frozen for up to 2 weeks. Defrost frozen cookies in the fridge before baking.
Apparently makes 30 3-inch cookies, but I got substantially more than that.
The original batch: paler, flatter and chewier. Cloudier that day, too.

Wednesday, September 1, 2010

Roasted marshmallow ice cream sandwiches

Oh my! These were pretty amazing. I've had roasted marshmallow ice cream on my mind for a few years now, as it's one of the more popular flavours at Greg's Ice Cream in Toronto. I don't live in Toronto any more, but I always go to Greg's when I'm in town. Their sweet cream ice cream is my favourite--it's like vanilla without the vanilla. Cardamom is another fave, though both these seemed like they'd be fairly easy to reproduce. The roasted marshmallow, on the other hand, is the subject of much speculation on Toronto food sites. I had to experiment.
When I made the Baked Alaska I noticed the toasted Italian meringue tasted very much like roasted marshmallows. So, I decided to use that, as I was too lazy to make my own marshmallows, and the store-bought ones are a bit scary. The recipe worked out nicely, as the custard used the egg yolks and the meringue the whites. I took the sugar from the custard and used that in the meringue so the ice cream wouldn't be too sweet. Can ice cream be too sweet? The labour intensive part of this recipe was the browning of the meringue 'marshmallows'. I put tablespoon-sized blobs on a baking sheet and used my torch, but next time I might spread the meringue thinly and broil it. The more browned bits, the better. I added the browned meringue to the hot custard and whisked to blend. I decided not to use the blender, as I liked the tiny dark specks. The meringue didn't totally deflate, making this ice cream seem light.

Roasted marshmallow ice cream
Source: me!

2 cups milk
1 cup whipping cream
4 eggs, separated
about 1 cup sugar, divided
½ teaspoon cream of tartar
1 teaspoon vanilla
1 tablespoon rum
¼ cup water

Combine ⅔ cup of sugar and ¼ cup water in a small saucepan. Stir until sugar dissolves, then heat, without boiling, until the syrup reaches 236-244℉. While you are doing this, heat milk and cream to near boiling. Whisk eggs yolks and 3 tablespoons sugar together till thick and pale. Whisk hot milk/cream mixture in and return to pot. Stir constantly over medium-low heat until mixture thickens and coats the back of the spatula. Keep an eye on the syrup! If you are not comfortable doing all this at once, make the custard first, and cover the pot while you complete the meringue. When the syrup is at about 230℉, start whipping the egg whites and cream of tartar. When they reach soft peaks, add the remaining sugar and whip till stiff peaks form. Still whipping, add the hot syrup in a thin stream and beat till cool. Blob this mixture on a baking sheet, or spread thinly. Broil or use a torch and brown well. Whisk into hot custard, then chill thoroughly. When chilled and ready to churn, whisk again, adding vanilla and rum. The rum is to prevent it from freezing to hard. Churn in an ice cream maker and then transfer to a freezer-safe container to firm up. If you want to make ice cream sandwiches, put ice cream into a parchment lined 9"x13" pan to a depth of 1" or so. Freeze.

For the cookies, I took a gluten-free, coconut oil biscuit from here and put the gluten and butter back in! Here's the version I used, adapted from Tartelette:

8 tablespoons (110gr) unsalted butter, at room temperature
1 cup packed brown sugar
2 large eggs
1 tsp. vanilla extract
1/2 cup cocoa powder
2 cups all-purpose flour
1 tsp. baking powder
1/4 tsp. salt

In an electric mixer, beat the butter and sugar on medium speed until fluffy, about 2-3 minutes. Lower the speed and add the eggs, one at a time, beating well after each addition. Add the vanilla extract.
In a separate medium bowl, combine the cocoa powder, the flour, baking powder, and salt. Still with the mixer on low speed, at the dry ingredients to the butter mixture and mix until the dough starts to come together. Gather the dough into a ball and refrigerate at least 1 hour.
Preheat the oven to 350 degrees and line a pan with parchment paper or a silicone mat.
On parchment, roll out the dough to about 1/4-inch thick. Use your preferred cookie cutter to cut out as many pieces as you can, removing extra dough. Slide parchment onto cookie sheet and gather and re-roll the scraps if necessary. Make patterns on cookie with a fork or other tool if desired. Place on lined baking sheet and bake 8 - 10 minutes. Cool completely before sandwiching them with ice cream.
Are you still reading? Try this ice cream! The flavour is mild, but so good. I think these would be amazing with the graham crackers. They are my favourite ice cream sandwich cookies, as they soften up a bit more than these chocolate ones. Maybe chocolate dipped, for a s'morewich? 

Saturday, August 7, 2010

Chocolate Zucchini Cake


It's that time of the year again, when people start giving you lots of zucchini. When that happens, I start making cake with it because I can't say that I love the stuff. It's okay grilled or roasted, but there's really not that much flavour, which is why it's good in cake. Oh, and it was a great excuse to use my new cake plate, which I got in an antique (junk) shop. It's pale pink with lilacs, though you can't see them here. This cake, from Chocolate & Zucchini (of course), is very moist, rich and chocolaty. It's got lots of cocoa, coffee and dark chocolate chips. Even my brother commented on the chocolatiness and it was all I could do not to tell him about the zucchini, because he does not eat vegetables and wouldn't be amused. First I put carrots in ice cream, and now zucchini in my cake. What's next? I have no idea! You'll just have to tune in next time.

Tuesday, July 13, 2010

TWD: Brrrr-ownies

No mint here! These brownies are supposed to contain chopped up mint patties, and while one of my favourite childhood chocolate bars was Pep, a large mint patty, I decided to go with peanut butter cups this time around. I like chocolate and mint together, but the only time I have it is when I devour a box of After Eights every year at Christmas. That and the fact that my mother hates mint made me choose peanut butter (I was still camping out at her place when I made these). I'm glad I did use the peanut butter cups--these were fabulous. They were very deep, dark and fudgy, with pockets of peanut butter here and there. They were very rich, and I found one small square plenty, but it was amusing to watch my pregnant sister-in-law devour 4 in a row. I don't think the brownies can take any credit, but I'm happy to announce that I'm an aunt again, to baby Poppy, who was only a week late. Too bad I'm in Toronto and will have to wait till the end of the month to meet her.

This week's recipe was chosen by Karen of Welcome to our Crazy Blessed Life. She'll have the recipe posted on her site, and you can link to all the other TWD bakers' posts here. I bet some of them are even minty. Okay, now go make these--they are ridiculously easy and delicious. They'll only take a few minutes to whip up, and could be served for dessert with ice cream, or on a picnic, or even for breakfast, because peanut butter is a breakfast food, right?

Sunday, June 27, 2010

The Daring Bakers make chocolate pavlova!

Lots of pictures and not so many words today. I'm sure many of you are grateful! I made this challenge only days after it was revealed, which is very unusual for me. As I didn't write it up then, I can't remember much. What I do remember is that it was delicious, and I took it on a picnic along with the Daring Cooks' challenge of pâté and bread. This pav wasn't exactly what I think about for a picnic dessert, but it was certainly good. Even though I'm not a big fan of chocolate, the chocolate-mascarpone mousse was rich and delicious. The meringues were nice and crisp, and the crème anglaise-mascarpone-Amaretto mixture was the most amazing dessert sauce ever. 
I made a vanilla meringue, as chocolate on chocolate does not appeal. I'm glad I did, because this was already an incredibly rich dessert. I garnished with some wonderful organic cherries I had found on sale that morning. They were the reason I decided to make this dessert on a very busy day, what with the pâté and bread I was already making. 
I had fun piping the meringue and mousse in swirls. This is the sauceless version I packed up for the picnic, so we could add it at the last moment. I may even have tried to lick the jar it was in. The one I kept right-side-up travelled surprisingly well. 
They looked just like this on our picnic. In our minds' eye, anyway. But, I still had a few baked meringue bases left over, so a few days later, on a very cloudy and rainy day, I put together a blackberry curd pavlova with the curd left from these shortcakes. Click on the link for the curd recipe. It was a perfect combination, though the colour looks a bit weird in the gray light.
A few days after that, with my move date looming, I thought I had better use up some of the egg whites that were still in the fridge. This time I made a soft, marshmallowy meringue in the true pavlova style. There was lots of discussion in the forums about whether a crisp meringue was actually a pavlova, but I just stayed out of it and kept baking. I topped this pav with some strawberry-white chocolate mousse left over from the wedding cake, and topped it with some fresh strawberry coulis. This was fantastic! I'd go make another now if all my baking equipment weren't in storage. 
Blog-checking lines: The June 2010 Daring Bakers’ challenge was hosted by Dawn of Doable and Delicious. Dawn challenged the Daring Bakers’ to make Chocolate Pavlovas and Chocolate Mascarpone Mousse. The challenge recipe is based on a recipe from the book Chocolate Epiphany by Francois Payard
Original challenge recipes can be found here.

Tuesday, June 22, 2010

TWD: Dressy chocolate loaf cake


Some of Dorie's recipes have funny names, don't they? I love loaf cakes, but dressy and chocolate don't really do it for me. I do have some chocolate-loving friends, though, and they were helping me to move yesterday, so dressy chocolate loaf cake it was! What gussies this cake up is that it's cut into 3 layers and  sandwiched with jam. I used sour cherry jam, thinned with Amaretto. The frosting is a simple mixture of melted chocolate and sour cream. I used a mix of milk chocolate and 72% dark chocolate in the interest of using up what was left in my cupboard.

This was a really quick and easy cake to mix, which was a relief after the wedding cake marathon. I added some vanilla and upped the salt, as I find many of the recipes in the book could use a bit more. Some had trouble with this overflowing the pan, so I only filled the pan about ½ to ⅔ full and it rose just to the top. With the extra I filled a couple of ramekins. I think I'm going to have to break down and get a muffin pan one of these days, because I keep ending up with gigantic cupcakes. And eating them.
This is the one I taste-tested inhaled, so I used a different frosting. Chocolate cake I can do, but with chocolate icing too, no. Mixed with sour cream? Nope. So, I had some very sweet white icing in the freezer that was actually leftover Oreo filling, from this fun day. I thinned it with a bit of cream and slathered it on. Yum. Cleaning out the freezer was on my list, so this wasn't just idle procrastination from packing. I think this is why I've been 'almost finished' for 3 days. I'm sure some of you are rolling your eyes, but not only am I not a chocoholic, but I hate sour cream. I won't go into great detail about all the reasons I don't like it, but ick. It does make great cakes, though. I sometimes replace it with yogurt, which I love, love, love, but I wanted the richness here, and I wasn't sure yogurt would work for the frosting. 


I don't have a picture of the finished cake to post because it looked like a big brown blob. Maybe when I slice it and have internet again I'll add one. I'm writing this on Sunday night and the move is tomorrow. Hopefully I'll be sound asleep and all my stuff will be in its new home (storage) when this posts. :)

Thanks a lot to Amy Ruth from Amy Ruth Bakes for choosing this recipe. It was one I definitely would have passed over, and that would have been a shame. Check out the rest of the TWDers here.

Tuesday, April 27, 2010

The Daring Bakers get steamy!

The April 2010 Daring Bakers’ challenge was hosted by Esther of The Lilac Kitchen. She challenged everyone to make a traditional British pudding using, if possible, a very traditional British ingredient: suet. 


Suet? The stuff we feed to birds? Yup, that's the stuff:) This challenge caused a bit of controversy in the forums, right from the moment it was posted. Some declined to participate this month, while others looked for suet substitutes. Many got right to it and started producing puddings. I wasn't one of those, of course. I thought it sounded like a really interesting challenge, as I had never cooked with suet, but we were having a freak heat wave when it was announced, and the idea of steaming something for 5 hours did not appeal. Luckily (?) the weather reverted to seasonal chilliness and the challenge was on!


I went to the butcher shop looking for suet, and I swear the butcher did a happy dance when I asked for it. He came racing across the store to with a container of veal suet and questions about what I was going to do with it. He was quite happy that I was making something to eat and not bird food with it. Butchers are so enthusiastic about their craft! I don't eat that much meat, so I rarely go to the butcher's, but this one is my new go-to shop. In fact I went back later in the week to get the ingredients for the filling, but first let me tell you about rendering the suet.


Do not do this at home! The suet has no smell when cold, but when heated it immediately filled my apartment with this super-greasy smell. I do believe I sat there for the whole hour it took with a wrinkled up nose, feeling nauseous, and waiting for it to be ready. Of course, this was after I had separated the fat from all the attached membranes, but that part was fine--I'm not squeamish in the kitchen at all. I won't show you any photos of the suet, as it may be harrowing for some (like me--no need to relive the smell). The suet pastry was odourless, though, and very easy to make and work with. 


Now I needed to decide what to fill the puddings with. I decided to go with veal, as I was using veal suet. I know this doesn't make much sense, but bear with me. Most recipes seemed to include chunks of meat, as in steak and kidney pudding. I wondered if a larger cut of meat would work, so I bought some veal shanks and made osso bucco. I seasoned and browned the veal shanks, but removed one and refrigerated it, browned, but still raw inside, for the pudding. I didn't want it to be overcooked inside the crust, and I was afraid this was going to be a very expensive waste, with the price of veal shanks. I cooked one shank in the sauce made with marsala (remember the tiramisu challenge?), reduced and cooled the sauce, and then used it with the reserved piece of veal shank in the pudding.


I lined the 0.5L pudding basin with the pastry and put in lots of the sauce and vegetables, with the veal shank nestled in the middle. I then covered it with more pastry and trussed it like a turkey (actually, wrapped it in pleated wax paper and foil, tied the layers tightly to the bowl, and made a string handle). It was now ready to steam, which I did stovetop in a large pot, with an inch or two of gently boiling water, for 3.5 hours. It was well past bedtime then, so I put it in the fridge and reheated it for dinner the next day by steaming it for an hour.


Not the best photo, but this is the inside of the osso bucco pudding, with some gremolata sprinkled on top. It was delicious! The veal shank I cooked inside the pudding was much more tender and flavourful than the one I cooked on top of the stove. The sauce had that wonderful gelatinous quality and the bone marrow was fantastic with some salt and gremolata. The suet crust, however, I didn't like at all. It browned beautifully, and rose, but it was just a bit odd in texture and didn't seem to have much flavour. Maybe I was still disturbed by the rendering, or maybe it just needed more salt, but I ended up throwing it all away. 


For the sweet pudding, I decided to go with a Sussex Pond pudding. This pudding is made by encasing a whole lemon with lots of brown sugar and butter in a suet crush and steaming until a sauce is formed. I just wanted to make a tiny one, so I used a small Meyer lemon and a few kumquats. 
I sliced the fruit thinly, and refrigerated it overnight with the brown sugar and a few crushed pods of cardamom. The next day, I put it in the crust in a 0.2L pudding basin, layering an obscene amount of butter above and below the fruit. I should only have steamed this for an hour, as it was so small, but I left it for 2 hours, so I did not get the pond effect of the sauce running out. Instead it was a thick marmalade-like filling. It was absolutely delicious, and I ate most of it before I managed to stop myself and get a picture, hence the copious amount of whipped cream. I still didn't love the suet crust, but it was better here. 
Update! I came home from work today and decided to make a third pudding. This time I chose a chocolate sponge pudding made with butter. I followed this recipe, but lined the buttered pudding basin with sliced almonds and sugar, and added a few tablespoons of Amaretto to the batter. A half recipe steamed in a 0.5L basin for 45 minutes, and was rich, dense and delicious. 


This was such an interesting challenge--it was the first time since I joined that I used a totally new ingredient! Check out the slideshow to see all the fantastic pudding creations by the Daring Bakers.